Soft Christmas Peppermints
Table of Contents
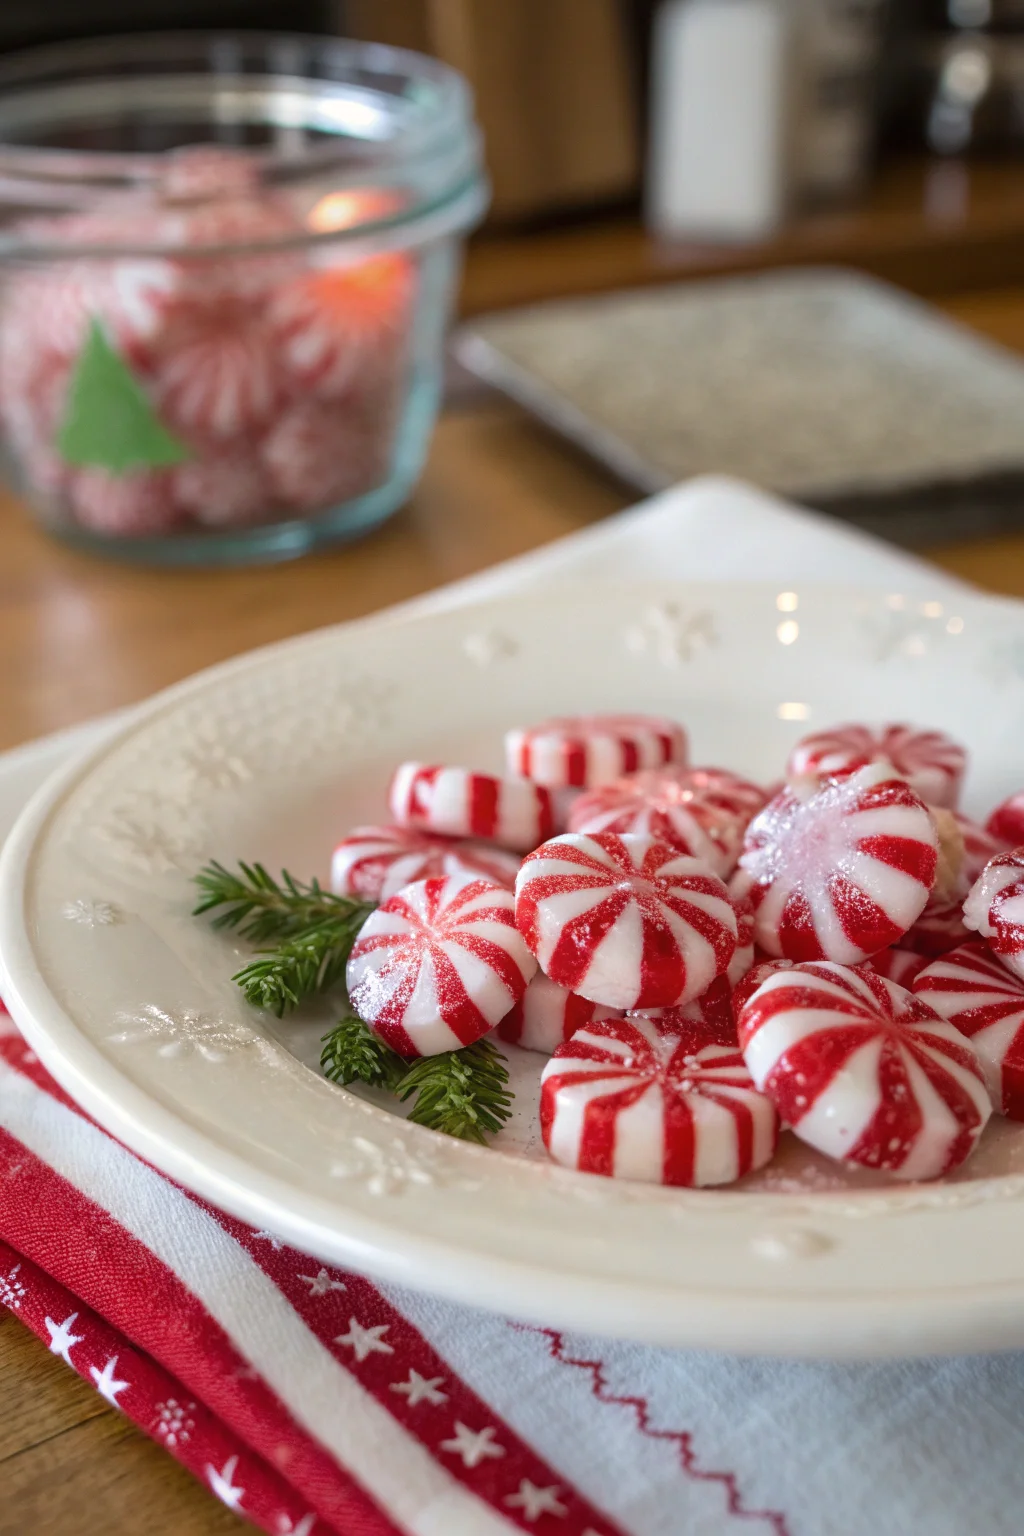
Ah, the sweet scent of peppermint always brings me back to those cozy winter afternoons spent in my grandmother’s kitchen, where love was the main ingredient in every dish. As the snow gently fell outside, my siblings and I would gather around the kitchen table, eagerly awaiting the soft, melt-in-your-mouth Christmas peppermints that Grandma would lovingly prepare. These delightful little candies weren’t just a treat; they were a family tradition wrapped in warmth and nostalgia, whispered through generations.
Today, I’m thrilled to share this cherished family recipe with you, hoping it brings the same sense of comfort and joy to your holiday celebrations. Imagine a bustling kitchen filled with laughter, the festive aroma of peppermint filling the air, and the satisfying sweetness of homemade candy that disappears almost as soon as it’s made. These Soft Christmas Peppermints are not only a festive delight but a simple way to create lasting memories with your loved ones.
Why This Recipe Should Be on Your Table
Soft Christmas Peppermints are more than just a treat—they’re a celebration of the season. Here are a few reasons you’ll want to make them part of your holiday tradition:
- Unforgettable Flavor: With just the right hint of peppermint, these candies offer a refreshing burst of flavor that perfectly complements your holiday spread. The balance between the cool mint and the sweet, creamy texture makes these candies irresistible.
- Simple Ingredients: You likely have most of these ingredients already, making it an easy go-to recipe when you want something sweet and special. Using pantry staples like powdered sugar and sweetened condensed milk means you can whip these up without a trip to the store.
- Family Fun: This is a perfect recipe to involve the kids. Rolling and twisting the colorful dough is not just fun—it’s a creative way to spend time together. It’s an excellent opportunity for children to learn about measuring ingredients and the joy of creating something delicious from scratch.
- Gift-Worthy: These peppermint candies are perfect for gifting. Pack them in a cute tin or jar, and you have a homemade gift that’s sure to bring joy to anyone who receives it. Personalize your gifts with ribbons and tags for an added touch of holiday spirit.
- Lasting Memories: Every time you make these, you’re creating a new memory, a new story to tell, and a tradition that can be passed down for generations. Sharing stories and laughs over a bowl of these soft peppermints can become a cherished annual ritual.
Kitchen Tools to Make This Recipe Easy Peasy
To whip up these delightful Soft Christmas Peppermints, you won’t need an arsenal of kitchen gadgets. Here’s what you’ll need:
- Large Mixing Bowl: Essential for combining your ingredients smoothly. A sturdy bowl helps manage the sticky dough and makes mixing easier.
- Sifter or Fine Mesh Strainer: To ensure your powdered sugar is lump-free. This step is crucial for the texture and ensures a smooth and creamy candy base.
- Measuring Cups and Spoons: Precision is key for achieving the perfect texture. Accurate measurements ensure the dough has the right consistency.
- Mixing Spoon or Spatula: For mixing the dough until it reaches the desired consistency. A sturdy spatula helps with incorporating the ingredients fully.
- Food Coloring: Gel colors work best for vibrant hues without altering the dough’s texture. A little goes a long way in achieving those festive reds and greens.
- Parchment Paper: To line your baking sheet, ensuring easy removal of candies once they’ve dried. It prevents sticking and makes cleanup a breeze.
- Knife or Dough Cutter: To slice your twisted dough into even segments. A sharp knife ensures clean cuts and uniform pieces.
- Baking Sheet: Where your candies will rest and firm up. Choose a large enough sheet to accommodate all your candies without crowding.
How to Make This Recipe Easy Peasy
INGREDIENTS
- 3 ¾ cups powdered sugar (plus extra for dusting)
- ⅓ cup sweetened condensed milk
- ½ teaspoon peppermint extract
- Red and green food coloring (gel preferred)
- Granulated sugar (for coating)
INSTRUCTIONS
- In a large bowl, sift the powdered sugar to remove any lumps and set aside a small amount for dusting your work surface.
- Add the sweetened condensed milk and peppermint extract to the powdered sugar, mixing until a dough forms. The mixture should be sticky but manageable; if it’s too wet, gradually add more powdered sugar.
- Divide the dough into three portions. Leave one portion plain, and color the other two with red and green food coloring respectively. Knead each portion well until the color is evenly distributed.
- Dust your work surface lightly with powdered sugar. Roll each colored dough into thin ropes, about ½ inch thick.
- Twist the red, green, and plain ropes together gently to create a candy cane effect.
- Cut the twisted dough into 2-inch segments and shape into small rounds or discs.
- Roll each peppermint piece in granulated sugar to coat them completely.
- Place the coated candies on a baking sheet lined with parchment paper and allow to dry at room temperature for several hours or overnight to firm up.
Difficulty: Easy • Cuisine: American • Preparation Time: 20 minutes • Cooking Time: 0 minutes • Total Time: 8 hours (including drying time) • Calories: Approx. 50 kcal per peppermint • Servings: About 40 pieces
Note: Use gel food coloring for vibrant colors without altering the dough consistency. Dust your hands with powdered sugar while shaping to prevent sticking and maintain a smooth texture.
Health and Flavor Benefits of Ingredients
Each ingredient plays a special role in this recipe, not just in terms of flavor but also in creating that perfect, soft texture we all love:
- Powdered Sugar: Not only does it sweeten the candies, but its fine texture helps achieve that melt-in-your-mouth quality. It dissolves easily and provides a smooth base for the candies.
- Sweetened Condensed Milk: This ingredient adds a rich, creamy texture and sweet flavor, binding the ingredients together seamlessly. Its thickness helps maintain the candy’s shape.
- Peppermint Extract: Provides a refreshing, minty flavor that’s quintessentially Christmas. A small amount is enough to impart a robust flavor.
- Gel Food Coloring: Ensures vibrant, festive colors without altering the consistency of your dough. It allows for easy coloring with minimal mess.
- Granulated Sugar: Adds a delightful crunch to the outer layer, balancing the softness inside. It also prevents the candies from sticking to each other during storage.
Tasty Pairings to Serve with This Easy Peasy Dish
These soft, minty delights pair beautifully with a variety of holiday treats and drinks:
- Hot Cocoa: A warm mug of cocoa complements the refreshing coolness of the peppermint. The chocolate and mint combination is a classic, cozy pairing.
- Holiday Cookies: Serve alongside a plate of gingerbread or sugar cookies for a complete festive treat spread. The variety of textures and flavors will delight any guest.
- Cheese Platter: Add these candies to a cheese platter for a surprising sweet contrast to savory cheeses. The minty sweetness is a refreshing palate cleanser.
- Spiced Tea: A cup of cinnamon or clove-spiced tea brings out the peppermint’s cooling effect. The warmth of the spices balances the minty freshness perfectly.
Storage Tips and How to Enjoy Leftovers the Easy Peasy Way
To keep your Soft Christmas Peppermints fresh and delightful for as long as possible, follow these easy storage tips:
- Airtight Containers: Store your candies in an airtight container at room temperature to prevent them from absorbing moisture. This keeps them fresh and chewy.
- Layer with Parchment: If stacking, separate layers with parchment paper to keep them from sticking together. This also helps preserve their shape.
- Gift Giving: Wrap in cellophane or place in small tins for thoughtful holiday gifts. Personalize with festive ribbons and tags for a special touch.
- Refreshing Snack: Enjoy leftovers as a refreshing snack anytime, or use them to decorate cakes and cupcakes for an extra festive touch. They can also be used to garnish drinks or desserts.
There’s something truly magical about bringing easy peasy, homemade goodness into your kitchen, especially during the holidays. These Soft Christmas Peppermints are not just candies; they’re a connection to cherished memories and a bridge to new traditions. May each bite bring you closer to the warmth and joy of the season, and remind you of the simple pleasures of home-cooked love.
Pin this Easy Peasy recipe!
Love this recipe? Pin the image below to your favorite Pinterest boards and bring a little Easy Peasy comfort to your kitchen whenever you need it.
Soft Christmas Peppermints
Ingredients
Equipment
Method
- Sift the powdered sugar in a large bowl to remove lumps and set aside a small amount for dusting.
- Add the sweetened condensed milk and peppermint extract to the powdered sugar, mixing until a dough forms. Adjust with more powdered sugar if too wet.
- Divide the dough into three portions. Leave one plain, color the others with red and green food coloring, kneading until even.
- Dust your work surface with powdered sugar. Roll each colored dough into thin ropes about ½ inch thick.
- Twist the red, green, and plain ropes together gently for a candy cane effect.
- Cut the twisted dough into 2-inch segments and shape into small rounds or discs.
- Roll each peppermint piece in granulated sugar to coat them completely.
- Place candies on a baking sheet lined with parchment paper and allow to dry at room temperature for several hours or overnight.