Vegan Love Letter Pastries
Table of Contents
The kitchen is where memories are made, isn’t it? It’s the heart of the home, a place where simple ingredients transform into something magical. Today, I’m inviting you into my cozy kitchen to create a recipe that’s as heartwarming as it is delicious: Vegan Love Letter Pastries. These charming little treats are a delightful blend of nostalgia and creativity, perfect for sharing with those you love.
Growing up, my grandmother would always have a fresh batch of pastries waiting on the kitchen table whenever I visited. The smell of sweet dough baking is a memory I’ll always cherish. Inspired by those moments, I’ve crafted these delightful pastries to bring a bit of that homemade magic to your home, too. They’re vegan, but even more importantly, they’re made with love and a sprinkle of sugar, just like grandma used to do.
These Vegan Love Letter Pastries are perfect for anyone looking to relish the joys of home baking without the fuss. They’re a celebration of simplicity with a touch of elegance, and they promise to deliver on the comforting flavors we all crave. Plus, they’re a wonderful way to show someone you care — because what says “I love you” better than a homemade pastry?
Why This Recipe Should Be on Your Table
Bringing these pastries to your table isn’t just about enjoying a delicious treat; it’s about creating moments that matter. Here are a few reasons why you’ll love making these:
- Heartfelt Connection: These pastries are like a warm hug from the oven, perfect for sharing with family and friends. They evoke a sense of nostalgia that can turn any gathering into a cherished memory.
- Simple Ingredients, Big Impact: Using everyday pantry staples, these pastries are both accessible and impressive. You don’t need fancy ingredients to make something extraordinary, which is what makes these pastries so special.
- Versatile Delight: Whether for a cozy brunch or a sweet afternoon snack, these pastries fit any occasion beautifully. They can be dressed up with a dusting of icing sugar or kept simple, depending on your preference.
- Vegan and Kind: Made with plant-based ingredients, they’re kinder to our animal friends and the planet. Enjoying these pastries is a delicious way to make a positive impact.
- Easy Peasy Preparation: With straightforward steps, these pastries are a breeze to make, even for beginners. You don’t need to be a seasoned baker to create something that looks and tastes amazing.
Kitchen Tools to Make This Recipe Easy Peasy
Before we dive into the recipe, let’s gather the tools that will make this baking adventure a cinch. Here’s what you’ll need:
- Mixing Bowl: Essential for combining your dry and wet ingredients efficiently.
- Sifter: Helps to aerate your flour and sugar for a lighter, more tender pastry.
- Food Processor (or your trusty hands): A food processor speeds up the dough-making process, but don’t worry if you prefer to mix by hand; it’s a great way to feel the texture of the dough.
- Measuring Spoons: Accurate measurements ensure the perfect balance of flavors in your pastries.
- Rolling Pin: For rolling out your pastry dough to the ideal thickness.
- Sharp Knife: Necessary for cutting dough into precise shapes.
- Baking Trays: To hold your pastries while they bake to golden perfection.
- Greaseproof Paper: Prevents sticking and makes cleanup a breeze.
- Mini Heart-Shaped Cookie Cutter: Adds a whimsical touch to your pastries, making them even more delightful.
How to Make This Recipe Easy Peasy
Now, let’s get to the fun part — making these delightful Vegan Love Letter Pastries. Follow along with these simple steps:
INGREDIENTS
- 240g of plain flour
- 2 tablespoons of caster sugar (plus extra for sprinkling)
- 220g of dairy-free block butter (cold and cut into small cubes)
- Ice-water (see method)
- 1 jar of vegan friendly strawberry jam
- Dairy-free milk (optional)
- Icing sugar (dusting, optional)
INSTRUCTIONS
- In a medium-sized mixing bowl, sift together the flour and sugar. Add in the cold, cubed butter and mix until it resembles sand. You can mix by hand or in a food processor. The key is to ensure the butter is evenly distributed for a flaky texture.
- Add in the ice water 1/2 tablespoon at a time until the dough comes together. It may require 1-2 tablespoons of ice-water. You want the dough to be smooth and slightly sticky, but not too dry or wet. This balance is crucial for rolling out later.
- Wrap the dough in some greaseproof paper and place it into the fridge for 30 minutes or until it feels firm. This will help to prevent sticking when you roll it out and give the gluten time to relax, making the dough easier to handle.
- Preheat oven to 170°C fan and line 2 baking trays with greaseproof paper. Preparing your oven and trays in advance ensures your pastries go into a hot oven, giving them the best start.
- Lay a sheet of greaseproof paper on your worktop and dust with some flour. This setup makes it simple to roll out the dough without it sticking.
- Roll out the dough in-between 2 sheets of floured greaseproof paper until it’s a large rectangle. Use a sharp knife to cut the dough into a diamond shape (approximately 10cm on each side). Place on the lined trays. Repeat until you’ve used up almost all the dough. Use a mini heart-shaped cookie cutter to cut out shapes with the remaining dough. These little hearts make charming additions to your pastries.
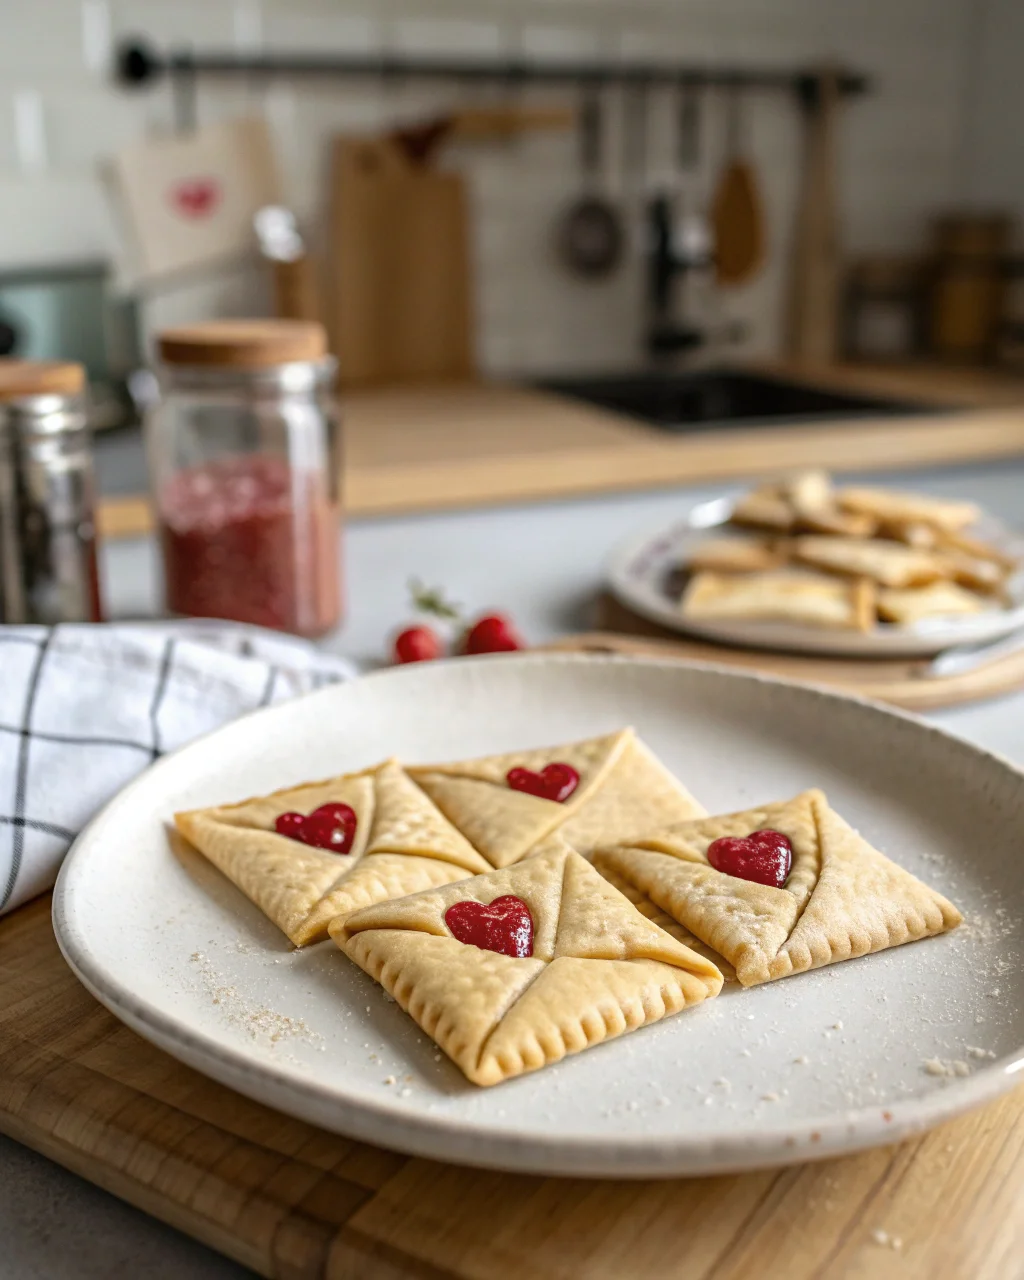
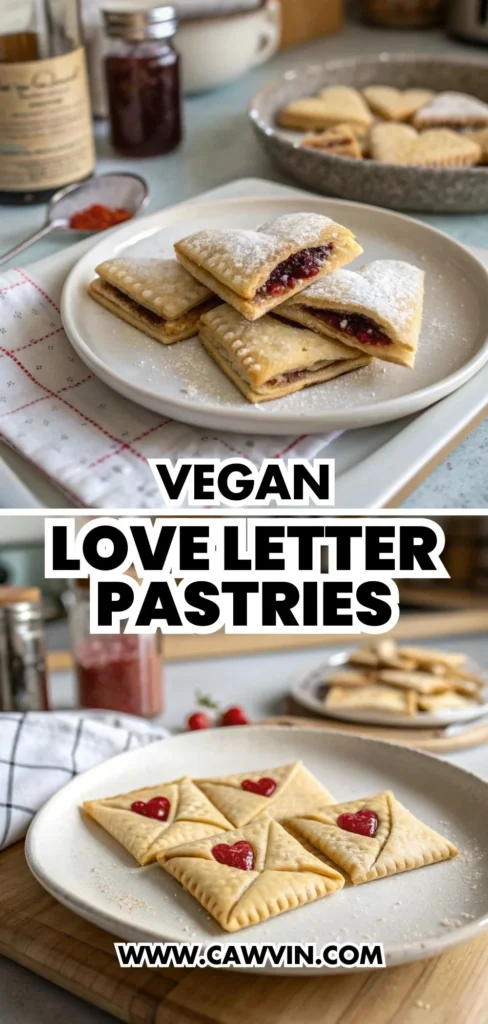
- Spoon a teaspoon or two of strawberry jam into the middle of the diamond shapes. Fold three of the corners into the center (sides and bottom) so that the pastry looks like an open envelope. Press the corners in to seal the jam in. This step is where the magic happens, transforming simple dough into a love letter.
- Brush the pastry with some dairy-free milk and stick on the hearts into the center. Sprinkle over some sugar, this will help give the pastry a golden color and will also make it crispy on top. The milk acts as a glue for the hearts and helps the sugar adhere.
- Bake the pastries in the middle of the oven for 20-25 minutes, or until the pastry is golden brown in color. Monitor them closely towards the end to avoid over-baking.
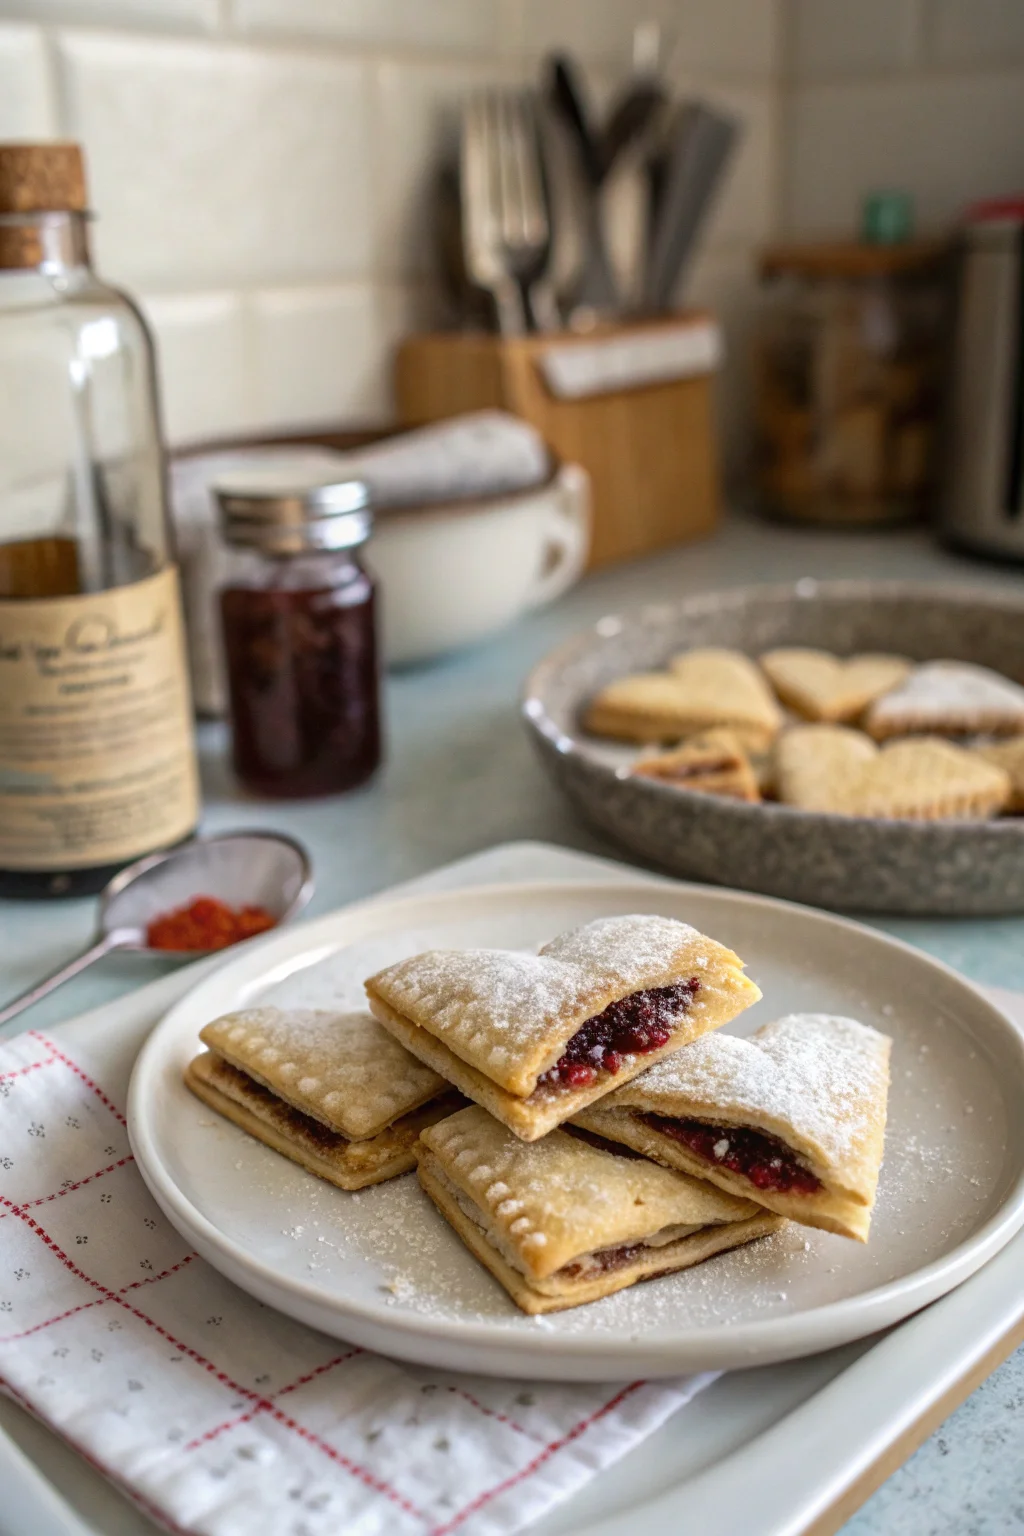
- Once baked, remove from the oven and allow to cool. The pastry will be a little soft when first out of the oven, but will crisp up beautifully. Patience is key here!
- Serve with a sprinkling of icing sugar. You could even add a drizzle of a simple glaze on top, but I personally think they’re perfect without it. Enjoy the moment with a delicious homemade pastry.
Difficulty: Easy • Cuisine: Vegan • Preparation Time: 10 minutes • Cooking Time: 25 minutes • Total Time: 35 minutes • Calories: 150 per pastry • Servings: 12
Note: If you prefer a different jam, raspberry or apricot would be delicious alternatives! Feel free to experiment with your favorite flavors.
Health and Flavor Benefits of Ingredients
The beauty of these pastries lies not just in their taste, but also in the thoughtful choice of ingredients. Here’s why each component is a superstar:
- Plain Flour: A pantry staple that forms the base of many comforting baked goods, bringing a familiar, nostalgic flavor. It’s versatile and provides the structure needed for the pastries.
- Dairy-Free Butter: Provides richness without the dairy, making these pastries suitable for vegans and those with lactose intolerance. It creates a buttery, flaky crust that everyone will love.
- Strawberry Jam: Offers a burst of fruity sweetness, packed with natural goodness and a touch of nostalgia. It brings color and a fresh, vibrant taste to the pastries.
- Caster Sugar: A little sweetness goes a long way, enhancing the flavor without overpowering it. It also helps in caramelizing the top of the pastries for extra crunch.
- Icing Sugar: Optional, but it adds a magical, snowy finish that makes these pastries extra special. It’s a simple way to add a touch of elegance.
Tasty Pairings to Serve with This Easy Peasy Dish
These Vegan Love Letter Pastries are delightful on their own, but why not elevate the experience with some perfect pairings? Here are some ideas:
- Herbal Tea: A soothing cup of chamomile or peppermint tea complements the sweet, fruity flavors beautifully. The calming effect of herbal teas makes it a perfect afternoon indulgence.
- Fresh Fruit Salad: Light and refreshing, a bowl of mixed berries or sliced kiwi provides a lovely contrast to the pastries. The natural sweetness and acidity of the fruit balance the richness of the pastries.
- Dairy-Free Yogurt: Spoon some creamy coconut or almond yogurt on the side for a satisfying, balanced treat. It adds a creamy texture that pairs wonderfully with the crisp pastry.
- Coffee: For a more robust pairing, a cup of freshly brewed coffee enhances the pastry’s flavors and adds a comforting warmth. The bitterness of the coffee contrasts nicely with the sweet pastry.
Storage Tips and How to Enjoy Leftovers the Easy Peasy Way
If you happen to have any leftovers (a rare occurrence!), here’s how to keep them fresh and delicious:
- Storage: Place the pastries in an airtight container at room temperature for up to 3 days. For longer storage, refrigerate them, but be sure to let them come to room temperature before serving to enjoy their full flavor. This helps maintain the pastry’s texture and flavor.
- Reheating: Warm them in the oven at a low temperature for a few minutes to regain their crispness. Avoid using a microwave as it can make the pastries soggy.
- Creative Use: Crumble leftover pastries over a vegan ice cream or yogurt for a delightful dessert topping. This adds a lovely crunch and turns leftovers into something new and exciting.
There’s something truly special about gathering around the table with homemade delights like these Vegan Love Letter Pastries. They’re more than just a treat; they’re a testament to the love and care that goes into every Easy Peasy recipe. Whether you’re baking for a loved one or simply indulging your own sweet tooth, these pastries promise to deliver warmth and joy with every bite.
Pin this Easy Peasy recipe!
Love this recipe? Pin the image below to your favorite Pinterest boards and bring a little Easy Peasy comfort to your kitchen whenever you need it.

Vegan Love Letter Pastries
Ingredients
Equipment
Method
- In a medium sized mixing bowl, sift together the flour and sugar. Add in the cold / cubed butter and mix until it resembles sand. You can mix by hand or in a food processor.
- Add in the ice water 1/2 tablespoon at a time until the dough comes together. It may require 1-2 tablespoons of ice-water. You want the dough to be smooth and slightly sticky, but not too dry or wet.
- Wrap the dough in some grease proof paper and place into the fridge for 30 minutes or until it feels firm. This will help to prevent sticking when you roll it out.
- Preheat oven to 170°C fan and line 2 baking trays with grease proof paper.
- Lay a sheet of grease proof paper on your worktop and dust with some flour.
- Roll out the dough in-between 2 sheets of floured grease proof paper until its a large rectangle. Use a sharp knife to cut the dough into a diamond shape (approximately 10cm on each side). Place on the lined trays. Repeat until you’ve used up almost all the dough. Use a mini heart shaped cookie cutter to use out shapes with the remaining dough.
- Spoon a teaspoon or two of strawberry jam into the middle of the diamond shapes. Fold three of the corners into the centre (sides and bottom) so that the pastry looks like an open envelope. Press the corners in to seal the jam in.
- Brush the pastry with some dairy-free milk and stick on the hearts into the center. Sprinkle over some sugar, this will help give the pastry a golden colour and will also make it crispy on top.
- Bake the pastries in the middle of the oven for 20-25 minutes, or until the pastry is golden brown in colour.
- Once baked, remove from the oven and allow to cool. The pastry will be a little soft when first out of the oven, but will crisp up beautifully.
- Serve with a sprinkling of icing sugar. You could even add a drizzle of a simple glaze on top, but I personally think they’re perfect without it.