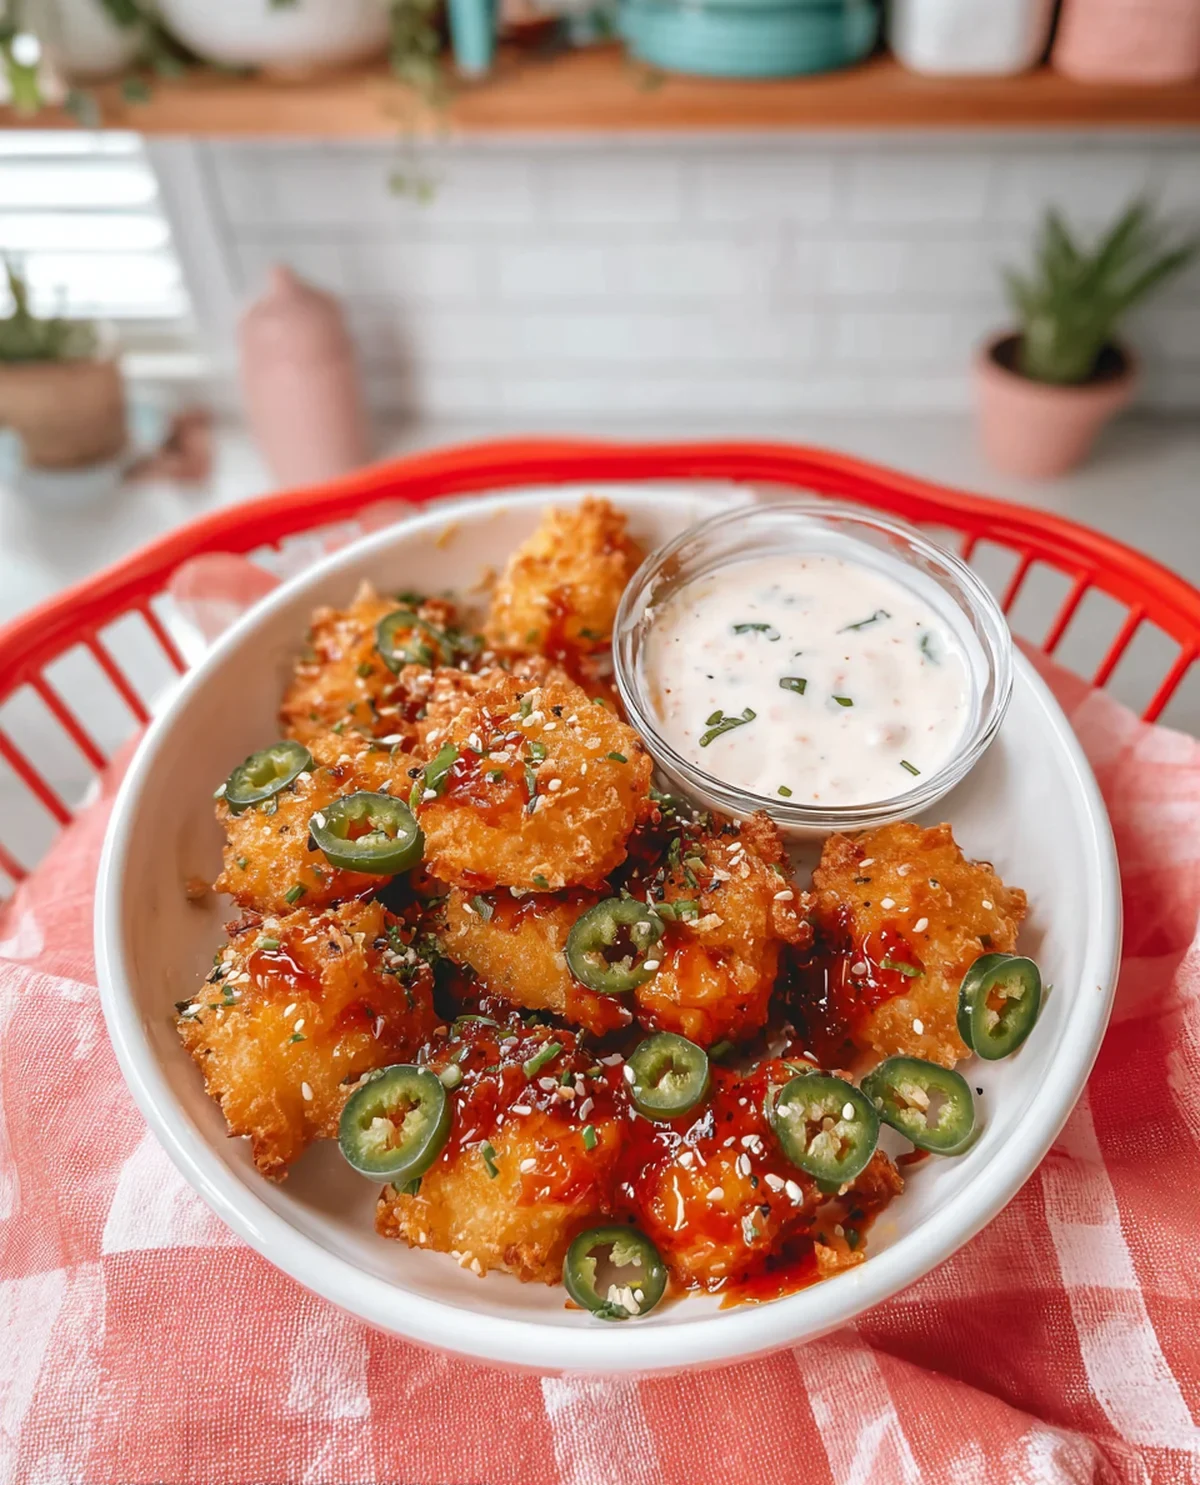
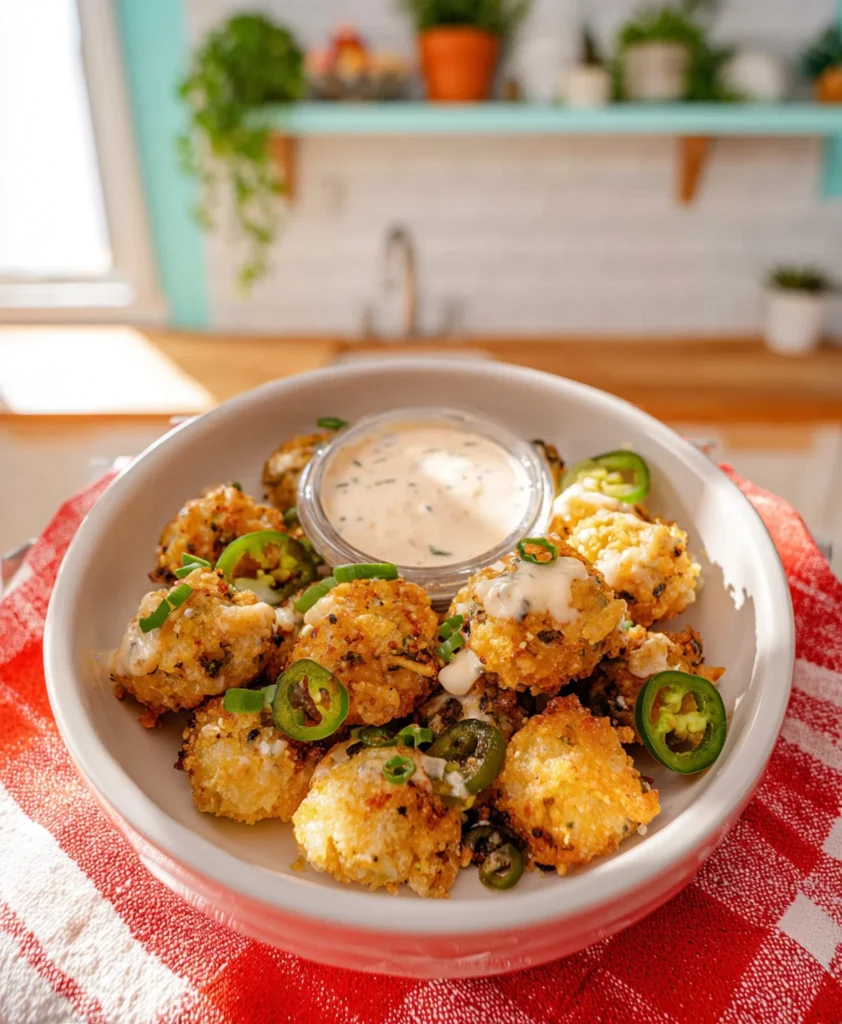
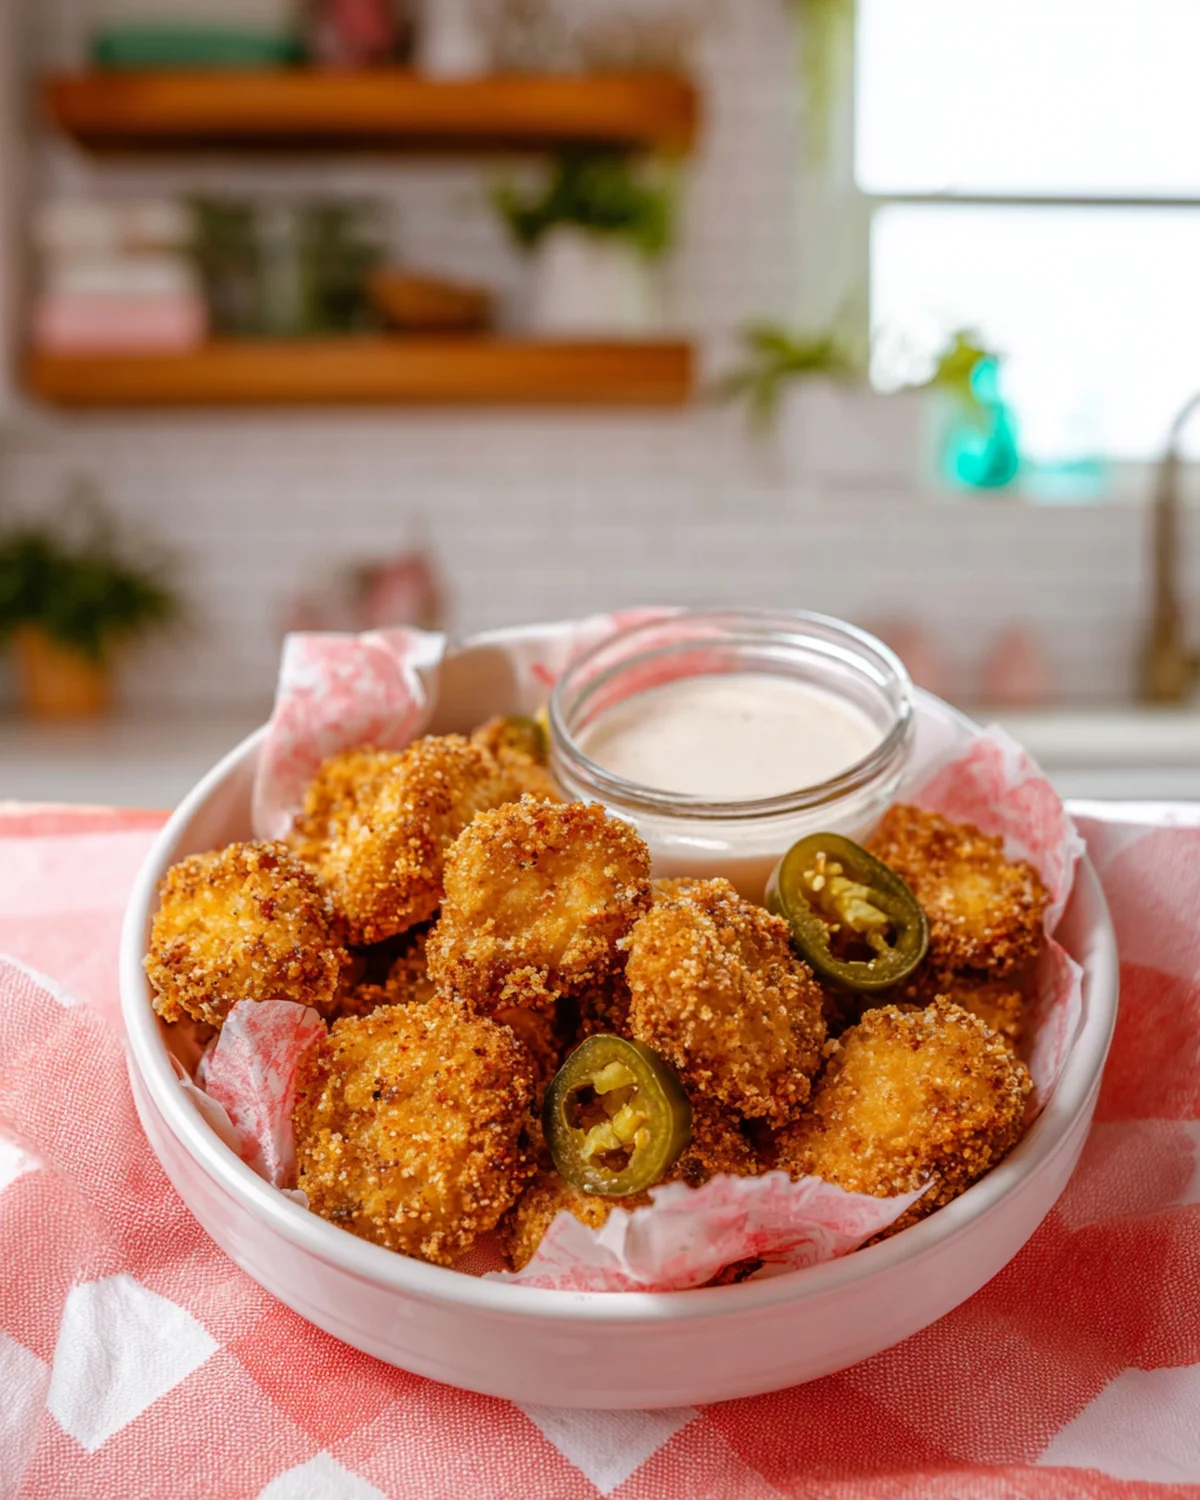
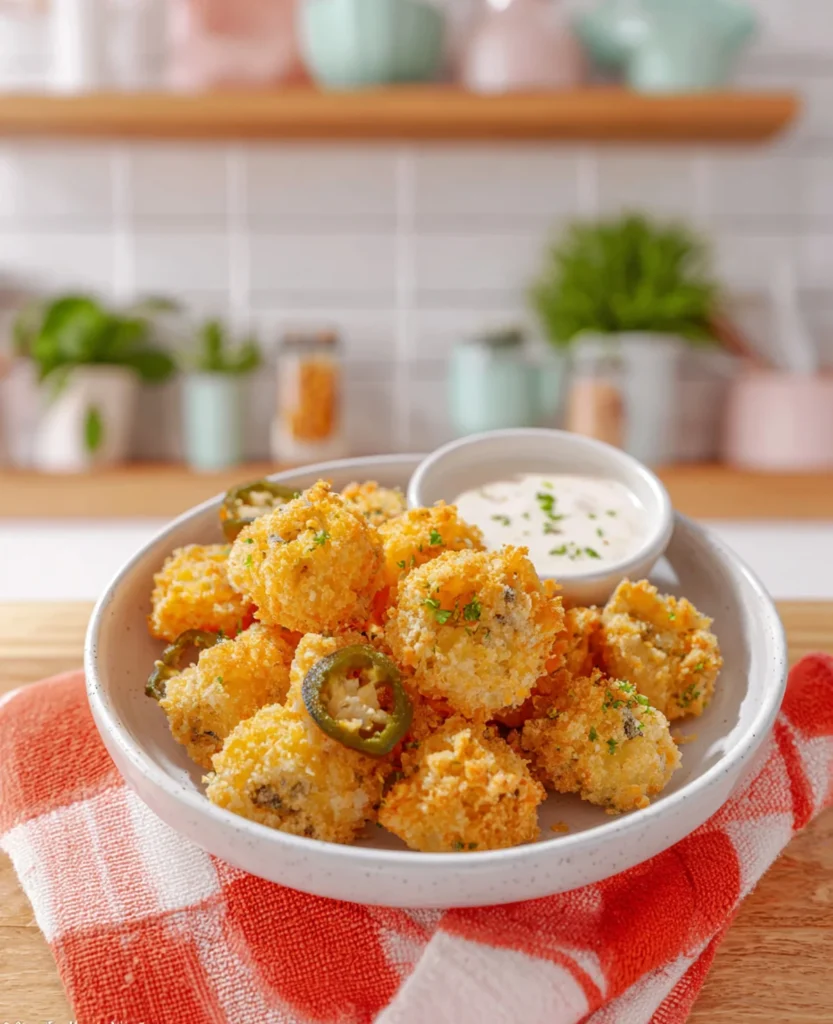
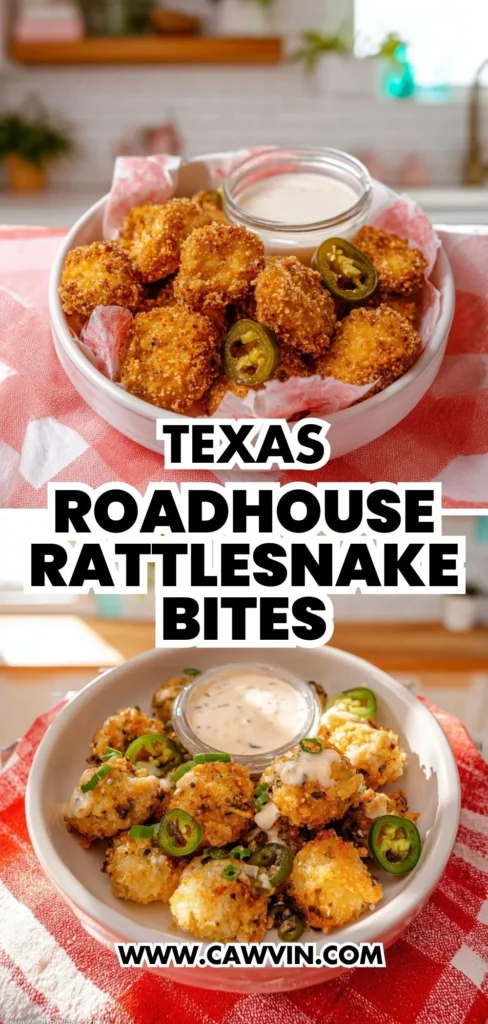
Texas Roadhouse Rattlesnake Bites
Table of Contents
There’s something marvelously nostalgic about the sizzling sound of a pan heating up with promise, isn’t there? Today, as we gather in this virtual kitchen, let’s embark on a culinary journey to recreate a beloved classic — Texas Roadhouse Rattlesnake Bites. These little bites of joy are not just about the delightful crunch or the gooey cheese that awaits inside. They’re a warm hug for your taste buds, reminiscent of family gatherings and joyful weekends spent around the table with loved ones.
This recipe holds a special place in my heart, reminding me of the times when my grandmother would let me help in the kitchen. Her kitchen was a place of love, laughter, and the occasional flour fight, where I learned the magic of creating something delicious from simple ingredients. The beauty of these Rattlesnake Bites lies in their simplicity — they’re easy to make, yet they deliver so much flavor and satisfaction. With each bite, you’re taken on a journey of cheesy goodness, complemented by a hint of jalapeño heat that brings a comforting warmth, just like a cozy blanket on a chilly evening.
So, whether you’re looking to impress your guests with a homemade appetizer or simply want to indulge in some cheesy comfort food, these bites are your perfect companion. Let’s dive into this recipe together and create something truly special that will have your kitchen filled with laughter and love.
Why This Recipe Should Be on Your Table
These Texas Roadhouse Rattlesnake Bites bring a delightful kick to your appetizer game, making them a must-have for any occasion. Here’s why they deserve a spot on your table:
Crowd-Pleaser: These bites are sure to be a hit at any gathering, with their irresistible combination of crispy exterior and melty cheese interior. Perfect for parties, picnics, or cozy nights in, they vanish quickly, leaving everyone craving more. The satisfaction of seeing your guests reach for seconds and thirds is truly rewarding.
Simple Ingredients: Using everyday ingredients, these bites are easy to throw together without a trip to a specialty store. You likely have most of the ingredients at home, making it a convenient option for spontaneous gatherings. The accessibility of the ingredients means you can whip these up at a moment’s notice, a real lifesaver for last-minute plans.
Customizable Spice Level: Adjust the heat to your preference by adding more or fewer jalapeños, making it suitable for all palates. You can even experiment with other peppers or spices to suit your taste. For those who enjoy a milder version, consider substituting banana peppers, which offer a subtle sweetness without the heat.
Perfect for Sharing: These are great for sharing, encouraging everyone to gather around and enjoy together. Their bite-sized nature makes them easy to serve and enjoy without any fuss. They’re an ideal addition to any appetizer platter, harmonizing well with other finger foods.
Versatile Appetizer: Serve them as a starter for a dinner party or a snack for game day — they fit any occasion perfectly. They pair well with a variety of dips and can be part of a larger spread of appetizers. Consider pairing them with a zesty salsa or a creamy guacamole for an added burst of flavor.
Kitchen Tools to Make This Recipe Easy Peasy
To whip up these delightful bites, you won’t need much — just a few trusty kitchen tools, much like the ones my grandma used when teaching me the joy of homemade snacks:
Mixing Bowls: For combining all that cheesy goodness with the jalapeños and garlic. A large bowl helps in evenly distributing the ingredients, ensuring each bite is packed with flavor. Consider using a glass or stainless steel bowl to prevent any flavors from seeping in and affecting future recipes.
Baking Sheet: To freeze the cheese balls before frying, ensuring they hold their shape. Lining it with parchment paper prevents sticking and makes cleanup a breeze. The baking sheet can also double as a cooling rack post-frying if space is limited in your kitchen.
Medium Saucepan: Essential for frying the bites to golden perfection. A deep pan helps prevent oil splatters and maintains an even temperature for consistent frying. An oil thermometer is a handy tool to keep the heat just right, preventing undercooking or burning.
Wire Rack or Paper Towels: For draining the bites after frying, keeping them crisp and not greasy. A wire rack is especially useful for allowing excess oil to drip away, preserving the crunch. If using paper towels, change them out if they become too saturated.
Tongs or Slotted Spoon: To safely remove the bites from the hot oil. They provide control and safety, preventing burns and keeping the bites intact. A slotted spoon is particularly effective at letting excess oil drain off before transferring to the cooling rack.
How to Make This Recipe Easy Peasy
Ingredients
- 1 ½ cups mozzarella cheese shredded
- 1 cup white cheddar cheese shredded (see note)
- 2 jalapeños seeded and minced
- 1 clove garlic minced
- ½ cup all-purpose flour
- 2 large eggs
- ¼ cup milk
- 2 cups panko bread crumbs
- ½ teaspoon smoked paprika
- ¼ teaspoon salt
- Vegetable oil or other neutral oil, for frying
- Ranch dressing for serving
Instructions
In a large bowl, stir together the shredded mozzarella, cheddar, jalapeños, and garlic until evenly combined. Take care to distribute the jalapeños and garlic evenly for consistent flavor. If you prefer, you can use a food processor to mix the ingredients quickly and achieve a uniform consistency.
Form the cheese mixture into 10 balls by using your hands to squeeze the mixture together as tightly as possible. Place the balls on a baking sheet and freeze for 4 hours. (Do not skip the freezing step; it helps the bites hold their shape during frying.) For a more uniform size, consider using an ice cream scoop or cookie scoop for portioning.
Pour the oil into a medium saucepan until it comes 1 inch up the sides. Place over medium-high heat until the oil reaches 350 degrees F. (You will need to fry in batches to avoid overcrowding the pan.) Keeping a kitchen thermometer handy ensures the perfect frying temperature, crucial for achieving a crisp exterior.
To prepare the breading station, place the flour in one bowl, whisk the eggs and milk together in another bowl, and then stir together the panko, smoked paprika, and salt in a third bowl. These steps ensure a well-coated, crispy exterior. For a thicker coating, repeat the egg wash and panko steps.
Roll each of the frozen cheese balls first in the flour, then in the egg wash, and finally in the bread crumbs. This triple coating process is crucial for that crispy, golden finish. Pat the breadcrumbs gently onto the cheese balls to ensure they adhere well.
Fry the bites for 2 minutes on each side, or until they have a golden brown on the outside and soft melty cheese on the inside. Carefully remove with tongs or a slotted spoon and allow to drain on a wire rack or paper towel-lined plate. Monitor the oil temperature between batches to maintain consistency.
Serve immediately with some ranch dressing for dipping. For an extra touch, garnish with chopped herbs or a sprinkle of smoked paprika for added color and flavor. Fresh chives or parsley can add a pop of color and fresh aroma to each serving.
Difficulty: Easy • Cuisine: American • Preparation Time: 20 minutes • Cooking Time: 10 minutes • Total Time: 4 hours 30 minutes • Calories: 150 per bite • Servings: 10
Note: For a spicier kick, consider adding an extra jalapeño or a pinch of cayenne pepper to the cheese mixture. You can also experiment with other types of cheese like pepper jack for more heat. The choice of cheese can significantly alter the flavor profile, allowing for endless variations to suit your taste.
Health and Flavor Benefits of Ingredients
These Texas Roadhouse Rattlesnake Bites not only promise delightful flavors but also come with some surprising benefits:
Mozzarella Cheese: A good source of calcium and protein, providing essential nutrients while keeping things deliciously cheesy. It also melts beautifully, creating that perfect stringy texture. Mozzarella’s mild flavor complements the heat from the jalapeños without overpowering it.
Jalapeños: Packed with vitamin C, they add a healthful boost alongside their spicy kick. They also contain capsaicin, known for its potential to boost metabolism. Jalapeños are versatile and can be adjusted to cater to different heat preferences, making them a flexible ingredient.
Garlic: Known for its anti-inflammatory properties, garlic brings depth of flavor and health benefits. It’s a heart-healthy ingredient that also enhances the overall taste profile. The aromatic quality of garlic adds a robust layer of flavor to the cheese mixture.
Panko Bread Crumbs: These provide a light, crispy coating without the heaviness of traditional bread crumbs. They create a satisfying crunch with less oil absorption. Panko crumbs are a great choice for achieving that restaurant-quality crispiness at home.
Tasty Pairings to Serve with This Easy Peasy Dish
These Rattlesnake Bites are versatile companions to various beverages and dishes, making them perfect for any occasion:
Ranch Dressing: A classic pairing that cools down the spice and complements the cheese. You can also try blue cheese dressing for a tangy alternative. The creamy texture of these dressings provides a nice contrast to the crunchy bites.
Cold Beer: The refreshing bubbles balance the richness of the cheese. A light lager or IPA works well to cleanse the palate. For a non-alcoholic option, try a sparkling water with a hint of citrus to keep things refreshing.
Crisp Salad: A light, fresh salad pairs beautifully, offering a contrast to the fried bites. Consider a vinaigrette dressing to cut through the richness. A side of arugula with lemon dressing can add a peppery freshness that enhances the overall meal.
Sweet Tea: The sweetness of the tea harmonizes with the savory and spicy notes of the bites. It’s a Southern classic that enhances the overall dining experience. If you prefer something less sweet, an iced green tea with mint can be a refreshing alternative.
Storage Tips and How to Enjoy Leftovers the Easy Peasy Way
If you find yourself with leftovers (though they disappear fast!), here’s how to store and enjoy them later:
Refrigeration: Store any leftover bites in an airtight container in the refrigerator for up to 3 days. Make sure they are cool before sealing to prevent condensation. Placing a paper towel in the container can help absorb excess moisture and maintain their crispiness.
Reheating: For best results, reheat in an oven or air fryer at 350°F for a few minutes until crispy and hot. Avoid microwaving as it may make them soggy and lose their delightful crunch. Reheating in an air fryer can restore their original texture almost perfectly.
Freezing: You can freeze the unfried cheese balls for up to a month. Simply bread them freshly before frying. This makes it easy to prepare ahead of time for future gatherings. To freeze, place them on a baking sheet in a single layer until solid, then transfer to a freezer bag.
There you have it, dear friends — a scrumptious recipe that brings warmth and joy to any table. Cooking at home is a beautiful way to connect with our loved ones and create cherished memories. With each stir, each sizzle, and every delightful bite, we’re not just cooking — we’re crafting moments that last a lifetime. So, gather your ingredients, invite a loved one to join you, and let’s make something delicious together. Happy cooking!
Pin this Easy Peasy recipe!
Love this recipe? Pin the image below to your favorite Pinterest boards and bring a little Easy Peasy comfort to your kitchen whenever you need it.

Texas Roadhouse Rattlesnake Bites
Ingredients
Equipment
Method
- In a large bowl, stir together the shredded mozzarella, cheddar, jalapenos, and garlic until evenly combined.
- Form the cheese mixture into 10 balls by using your hands to squeeze the mixture together as tightly as possible. Place the balls on a baking sheet and freeze for 4 hours. (Do not skip the freezing step.)
- Pour the oil into a medium saucepan until it comes 1 inch up the sides. Place over medium-high heat until the oil reaches 350 degrees F. (You will need to fry in batches.)
- To prepare the breading station, place the flour in one bowl, whisk the eggs and milk together in another bowl, and then stir together the panko, smoked paprika, and salt in a third bowl.
- Roll each of the frozen cheese balls first in the flour, then in the egg wash, and finally in the bread crumbs.
- Fry the bites for 2 minutes on each side, or until they have a golden brown on the outside and soft melty cheese on the inside. Carefully remove with tongs or a slotted spoon and allow to drain on a wire rack or paper towel-lined plate.
- Serve immediately with some ranch dressing for dipping.