Grinch Cookies
Table of Contents
There’s something truly magical about baking cookies that transport you back to childhood, isn’t there? The comforting aroma wafting through the house, the anticipation of a sweet treat fresh out of the oven, and the joy of sharing these moments with loved ones. Today, let’s bring a little whimsy and warmth to your kitchen with a delightful batch of Grinch Cookies. These cookies are more than just a treat; they’re a way to create lasting memories and sprinkle a bit of holiday cheer into your everyday life.
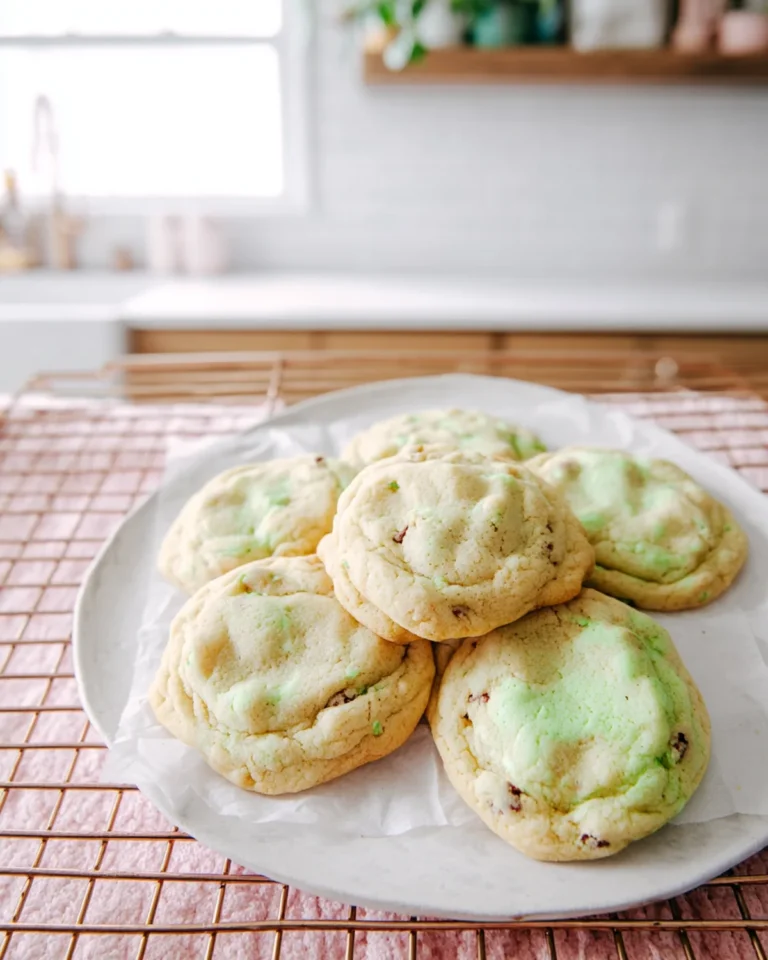
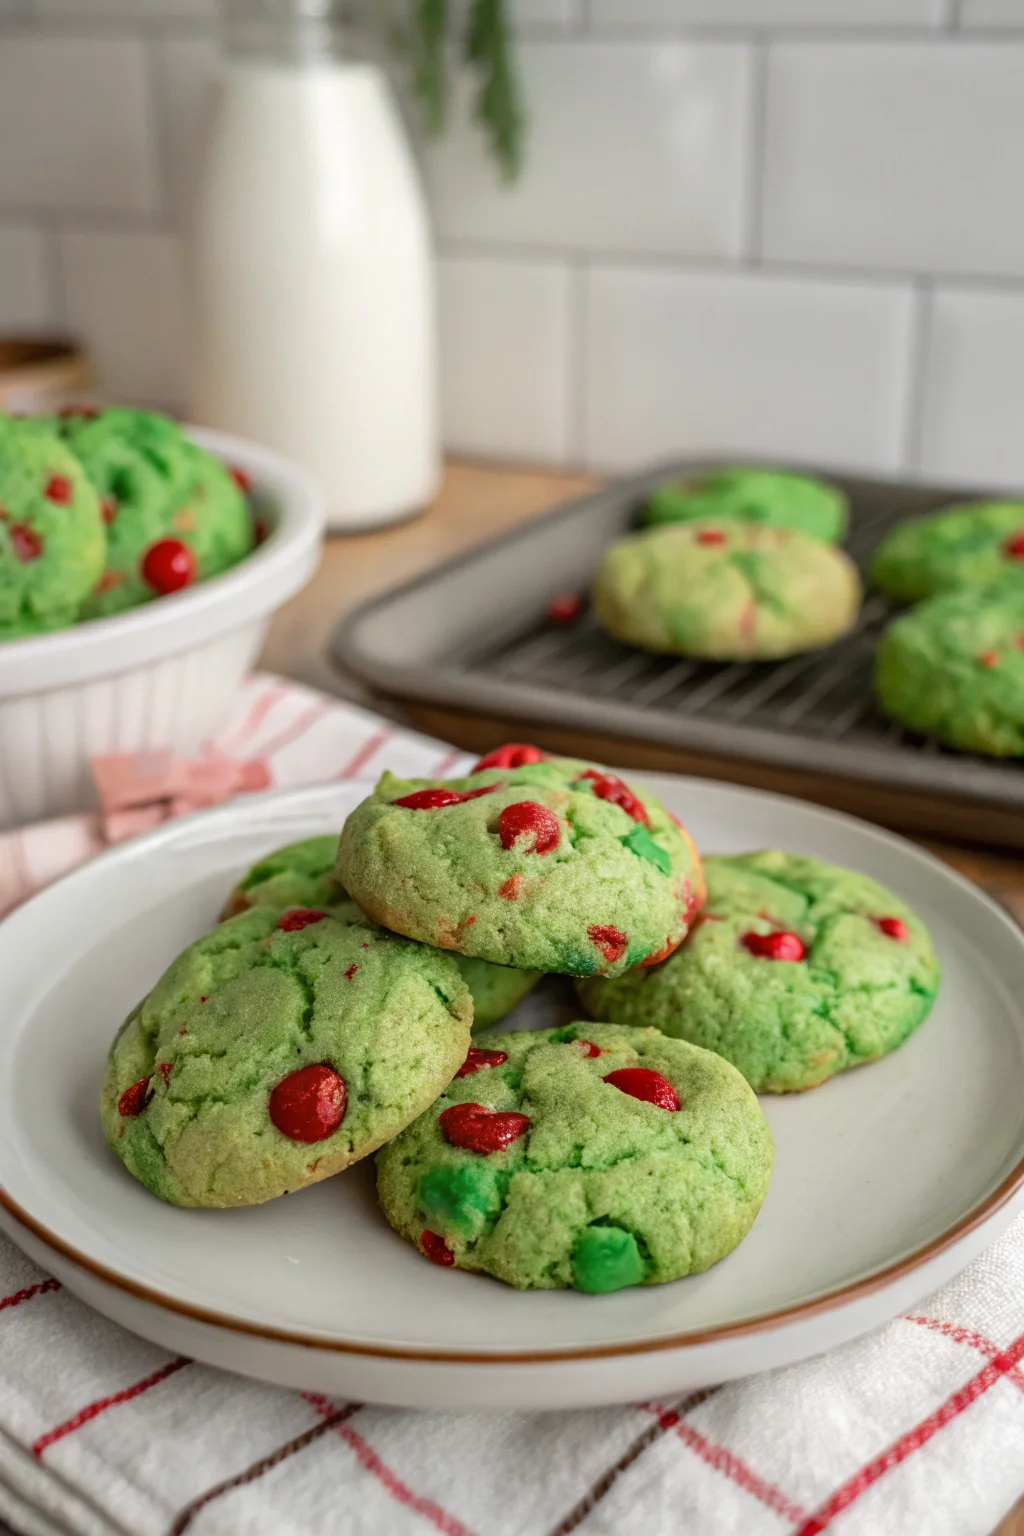
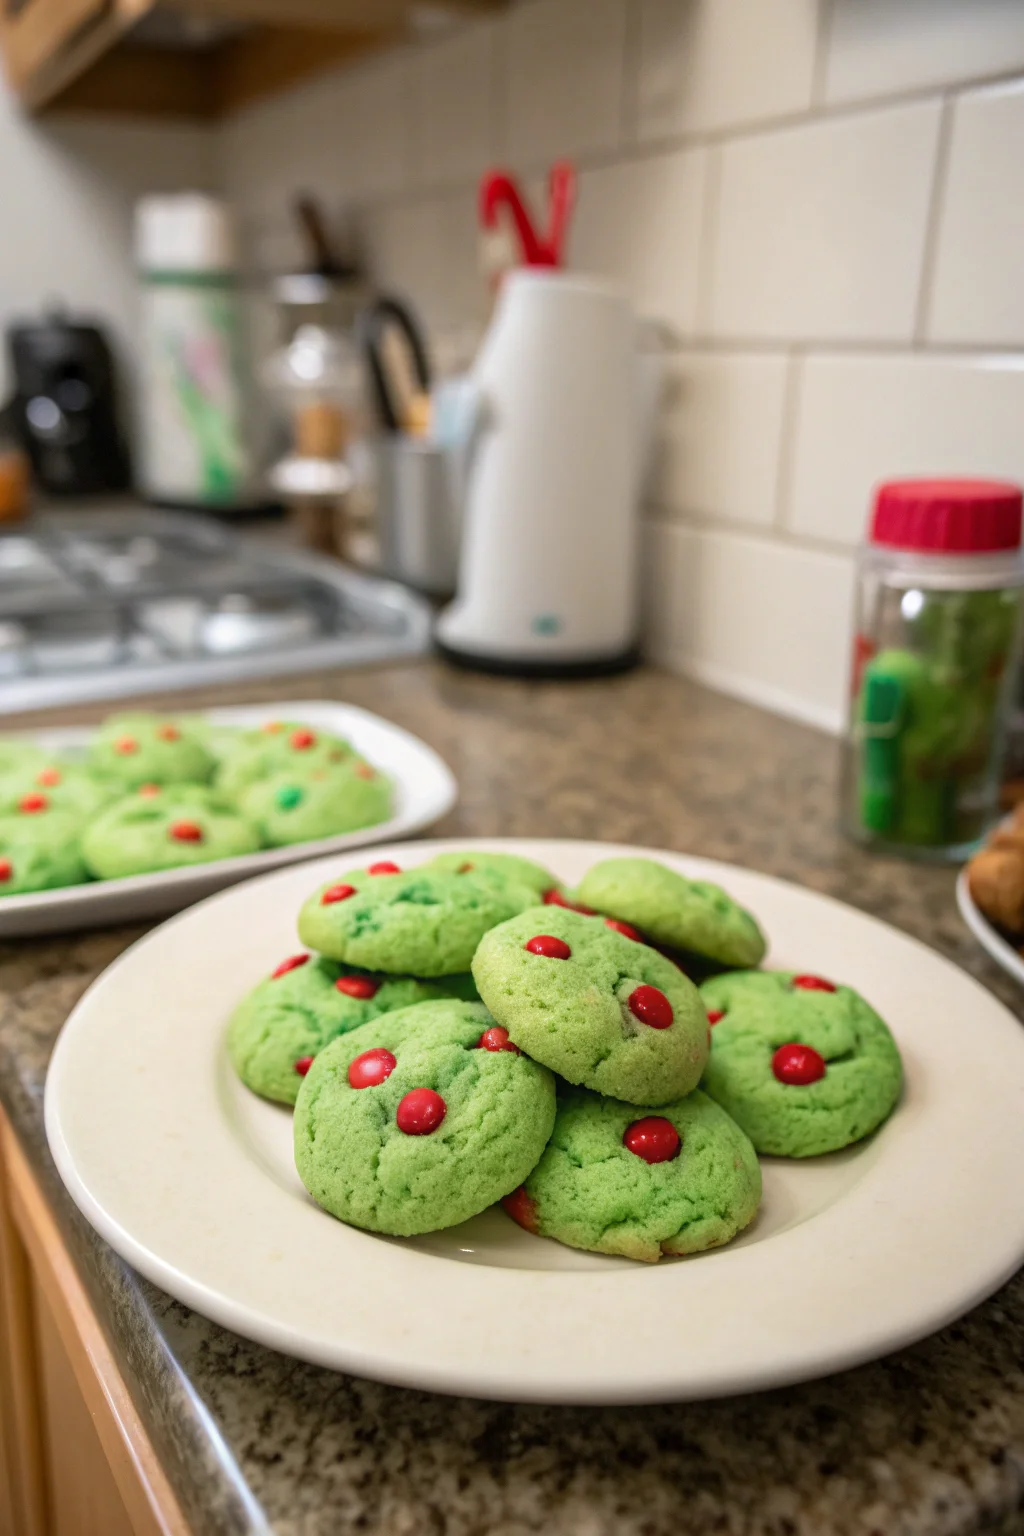
Imagine the delight on your family’s faces as they bite into these vibrant green cookies, perfectly adorned with a single red heart candy right in the center. These Grinch Cookies are not just a playful nod to a beloved holiday character, but they also embody the spirit of togetherness and joy that we all cherish during the holiday season. They’re quick to make, fun to bake with the kids, and perfect for gifting or enjoying with a cup of cocoa by the fireplace.
Let’s dive into the coziness and magic of making these cookies from scratch, and I promise you, it’s as easy peasy as a winter’s day can be.
Why This Recipe Should Be on Your Table
Grinch Cookies are not just about the taste; they’re about the experience. Here are some heartfelt benefits:
Family Fun: Baking these cookies is an activity that brings the whole family together. Kids will love helping with the dough and adding that special red heart candy. Baking with children not only teaches them basic cooking skills but also fosters creativity and patience. It’s a wonderful opportunity to create cherished memories as they learn to measure, mix, and decorate.
Holiday Cheer: With their vibrant green color and festive appearance, these cookies are perfect for holiday gatherings or as a gift to spread joy. Their striking color acts as a centerpiece, catching everyone’s eye and becoming a conversation starter. Imagine gifting these to friends and family wrapped in a festive tin or clear cellophane bags with a bright ribbon—sure to bring a smile to anyone’s face.
Quick and Easy: Using a boxed cake mix as a base, these cookies come together with minimal fuss, making them a go-to recipe for busy holiday schedules. The ingredients are likely already in your pantry, cutting down on last-minute trips to the store. This simplicity means you can whip up a batch in no time, even for unexpected guests or last-minute get-togethers.
Nostalgic Delight: They capture the essence of homemade goodness, reminiscent of childhood memories and family traditions. There’s something deeply satisfying about the scent of vanilla and butter wafting through the house, evoking feelings of warmth and nostalgia. These cookies remind us of simpler times, when the holidays were about more than just gifts—they were about togetherness.
Versatile Treat: Perfect for cookie swaps, holiday parties, or simply as a sweet surprise in a lunchbox. Their cheerful appearance makes them versatile enough to suit any occasion, from office parties to school events. Plus, they can be customized with different decorations, like festive sprinkles or icing, to suit any theme or personal preference.
Kitchen Tools to Make This Recipe Easy Peasy
To keep the process as seamless and enjoyable as possible, here are the kitchen essentials you’ll need:
- Large Mixing Bowl: For combining all your ingredients. A sturdy mixing bowl allows room for vigorous mixing without spilling.
- Electric Mixer or Whisk: To ensure a smooth dough. An electric mixer saves time and effort, especially when incorporating the butter into the cake mix.
- Baking Sheets: Lined with parchment paper for easy cleanup. This prevents the cookies from sticking and makes transferring them to a cooling rack a breeze.
- Cookie Scoop: For evenly sized cookies. Consistent size ensures even baking, so every cookie comes out just right—neither overbaked nor underdone.
- Cooling Rack: To allow cookies to cool and set after baking. A cooling rack promotes even airflow around the cookies, preventing them from becoming soggy on the bottom.
How to Make This Recipe Easy Peasy
INGREDIENTS
- 1 box vanilla cake mix
- ½ cup unsalted butter, softened
- 2 large eggs
- Powdered sugar (for rolling)
- Red heart-shaped candies
INSTRUCTIONS
- Preheat the oven to 350°F (175°C). Line two baking sheets with parchment paper. This step is crucial for ensuring your cookies bake evenly and don’t stick.
- In a large bowl, combine the cake mix, softened butter, and eggs. Mix until a soft dough forms. Add green gel food coloring, a few drops at a time, until the desired shade of green is achieved. This is a fun step to involve the kids, as they can watch the dough transform into the iconic Grinch green.
- Scoop out tablespoons of dough and roll into balls. Coat each ball in powdered sugar before placing them on the prepared baking sheets. The powdered sugar gives the cookies a slightly crackled appearance once baked, adding texture and visual interest.
- Bake for 8-10 minutes, or until the edges are set. Immediately press a red heart candy onto the center of each cookie once removed from the oven. Allow to cool completely. This step adds the final touch, turning these treats into true Grinch Cookies.
Difficulty: Easy • Cuisine: American • Preparation Time: 10 minutes • Cooking Time: 10 minutes • Total Time: 20 minutes • Calories: 150 per cookie • Servings: 24 cookies
Note: Feel free to adjust the amount of food coloring to achieve your preferred shade of Grinch green! Remember, the gel food coloring is potent, so start with a minimal amount and gradually increase to avoid an overly intense hue.
Health and Flavor Benefits of Ingredients
- Vanilla Cake Mix: Provides a sweet, vanilla base that’s both rich and light, making it a versatile choice for various cookie flavors. The convenience of a cake mix also ensures consistency in flavor and texture.
- Butter: Adds a creamy texture and enhances the flavor with its rich, buttery goodness. Butter contributes to the moistness of the cookies, making them more delicious with each bite.
- Eggs: Essential for binding the ingredients together, they also contribute to the cookies’ soft and chewy texture. Eggs add richness and help the cookies rise slightly, giving them a pleasant, soft center.
- Powdered Sugar: Creates a lovely outer coating that adds a hint of sweetness and a beautiful contrast to the green cookies. It also gives a slight crunch to the exterior, enhancing the overall eating experience.
- Red Heart-Shaped Candies: These aren’t just for decoration; they offer a delightful pop of color and a fun, thematic touch that ties in with the Grinch theme. They add a sweet surprise at the center of each cookie, delighting both the eyes and the taste buds.
Tasty Pairings to Serve with This Easy Peasy Dish
Pair these Grinch Cookies with a warm mug of hot chocolate or a spiced chai tea for a cozy, comforting treat. The rich chocolate or aromatic spices complement the cookies’ sweetness, creating a harmonious balance. They also make a delightful addition to a holiday dessert platter alongside gingerbread cookies and peppermint bark. For a festive touch, serve them with a scoop of vanilla ice cream and watch as they bring smiles to everyone’s faces.
Consider serving them at your holiday movie night, especially when watching “How the Grinch Stole Christmas,” to enhance the theme and make the evening more special. The cookies can also be a sweet ending to a holiday meal, ensuring everyone leaves the table with a sweet memory.
Storage Tips and How to Enjoy Leftovers the Easy Peasy Way
Store your Grinch Cookies in an airtight container at room temperature. They should stay fresh for up to a week, making them a great make-ahead treat for your holiday festivities. To maintain their softness, consider placing a slice of bread in the container, as it will help absorb any excess moisture, keeping the cookies tender.
If you want to enjoy them warm, simply pop them in the microwave for a few seconds to bring back that fresh-from-the-oven taste. This little trick revives the cookies’ original texture and aroma, making them taste like they were just baked.
These cookies are also freezer-friendly! Arrange them in a single layer on a baking sheet, freeze until firm, then transfer to a sealed container. They can be stored in the freezer for up to three months. When you’re ready to indulge, just let them thaw at room temperature or warm them gently in the oven. This makes them an excellent option for long-term storage, allowing you to enjoy them throughout the holiday season.
In closing, baking is truly a labor of love, and these Grinch Cookies are a perfect testament to that. They are a reminder that the simplest of ingredients, when combined with a touch of creativity and a lot of heart, can bring immense joy to your home. Whether you’re baking them for family, friends, or yourself, these cookies are sure to brighten any occasion with their vibrant color and delightful taste.
Pin this Easy Peasy recipe!
Love this recipe? Pin the image below to your favorite Pinterest boards and bring a little Easy Peasy comfort to your kitchen whenever you need it.


Grinch Cookies
Ingredients
Equipment
Method
- Preheat the oven to 350°F (175°C). Line two baking sheets with parchment paper.
- In a large bowl, combine the cake mix, softened butter, and eggs. Mix until a soft dough forms. Add green gel food coloring, a few drops at a time, until the dough reaches the desired shade of green.
- Scoop out tablespoons of dough and roll into balls. Coat each ball in powdered sugar before placing them on the prepared baking sheets.
- Bake for 8-10 minutes or until the edges are set. Press a red heart candy onto the center of each cookie immediately after removing them from the oven. Cool completely.