French Dip Sliders
Table of Contents
In the cozy heart of my kitchen, where the comforting aroma of home-cooked meals mingles with cherished memories, the magic of French Dip Sliders comes alive. Imagine the scene: a gentle hum of conversation, the clinking of glasses, and the warmth of family gathered around. These sliders aren’t just a dish; they’re a delicious gateway to cherished moments, weaving together the threads of nostalgia and the delight of simple cooking.
The beauty of French Dip Sliders is that they carry with them a special kind of magic—one that speaks to the soul. Picture your loved ones eagerly awaiting a treat that’s both savory and satisfying, bringing smiles with every bite. This recipe captures the essence of comfort food in its truest form: gooey provolone cheese melting over tender slices of roast beef, all encased in soft Hawaiian rolls. It’s the kind of meal that wraps you in a warm embrace, much like a cherished family tradition passed down through generations.
As you prepare these sliders, the kitchen becomes a haven of heartfelt hospitality. The caramelized onions, mingling with fresh thyme, evoke a sense of home. Each step in creating this dish is a gentle reminder of the joy found in the process of cooking and sharing. Whether it’s a Sunday afternoon gathering or a cozy weeknight dinner, French Dip Sliders promise to fill your home with laughter, love, and the irresistible aroma of happiness. So, let’s dive in, friend, and make some beautiful memories together.
Why This Recipe Should Be on Your Table
These French Dip Sliders bring a unique twist to traditional sandwiches, making them a delightful addition to any gathering or a special treat for yourself. Here’s why they deserve a spot on your table:
- Nostalgic Comfort: Embrace the warm, familiar flavors of roast beef and melted cheese, reminiscent of childhood lunches and family dinners. The combination of these classic ingredients brings a sense of familiarity and comfort that is hard to resist.
- Easy Preparation: With simple steps and readily available ingredients, these sliders make meal preparation a breeze, even on the busiest of days. You don’t need to be a professional chef to create something that tastes this delicious.
- Versatile Enjoyment: Perfect for casual get-togethers, game nights, or as a comforting meal on a chilly evening. These sliders are adaptable and can be served as a main course or a hearty appetizer.
- Family-Friendly: Loved by kids and adults alike, these sliders are a crowd-pleaser, ensuring everyone’s plates are clean and hearts full. The soft Hawaiian rolls make them easy to handle for little hands, while the flavorful filling satisfies the bigger appetites.
- Delightful Dipping: The au jus gravy is not just a side; it transforms each bite into a savory experience that elevates the entire meal. The rich, flavorful dipping sauce adds an extra layer of indulgence that makes these sliders truly special.
Kitchen Tools to Make This Recipe Easy Peasy
To whip up these delightful bites, you won’t need much—just a few trusty kitchen tools, much like the ones my grandma used when teaching me the joy of homemade snacks.
- Large Nonstick Skillet: Essential for caramelizing onions to perfection, adding depth and sweetness to the sliders. The even heat distribution helps achieve that golden-brown color without burning the onions.
- 11×7-inch Baking Dish: Ideal for baking the sliders evenly, ensuring each roll is as perfect as the next. This size dish fits the Hawaiian rolls perfectly, keeping them snug and allowing the cheese to melt beautifully.
- Large Serrated Knife: Perfect for slicing the Hawaiian rolls, allowing for effortless assembly. A serrated knife glides through the soft rolls without crushing them, maintaining their fluffy texture.
- Small Bowl: Handy for mixing the butter and onion soup mix, infusing the rolls with savory flavor. This step adds a delightful, aromatic crust to the top of the sliders.
- Foil: Keeps the sliders moist during baking, resulting in a golden top without drying out. The foil traps steam, ensuring the cheese melts thoroughly and the rolls stay soft.
How to Make This Recipe Easy Peasy
Ingredients
- 3 tablespoons unsalted butter
- 1 medium onion, thinly sliced
- 2 teaspoons minced fresh thyme
- 1/4 teaspoon kosher salt
- 1/4 teaspoon black pepper
- 1 package Hawaiian rolls (12 count)
- 10 slices provolone cheese
- 14 ounces sliced deli roast beef
- 1/2 cup unsalted butter, melted
- 1 1/2 tablespoons dried onion soup mix
- 1 packet au jus gravy mix
- 3 cups water
- fresh chopped parsley, for garnish, optional
Instructions
- In a large nonstick skillet over medium heat, melt the butter. Add the onions and sauté, stirring occasionally, for about 12-15 minutes until the onions are soft and caramelized. Add the thyme, salt, and pepper; stir to combine. Set aside.
- Preheat the oven to 350°F. Spray an 11×7-inch baking dish with nonstick cooking spray.
- Using a large serrated knife, slice the rolls in half to create a top and bottom “slab.”
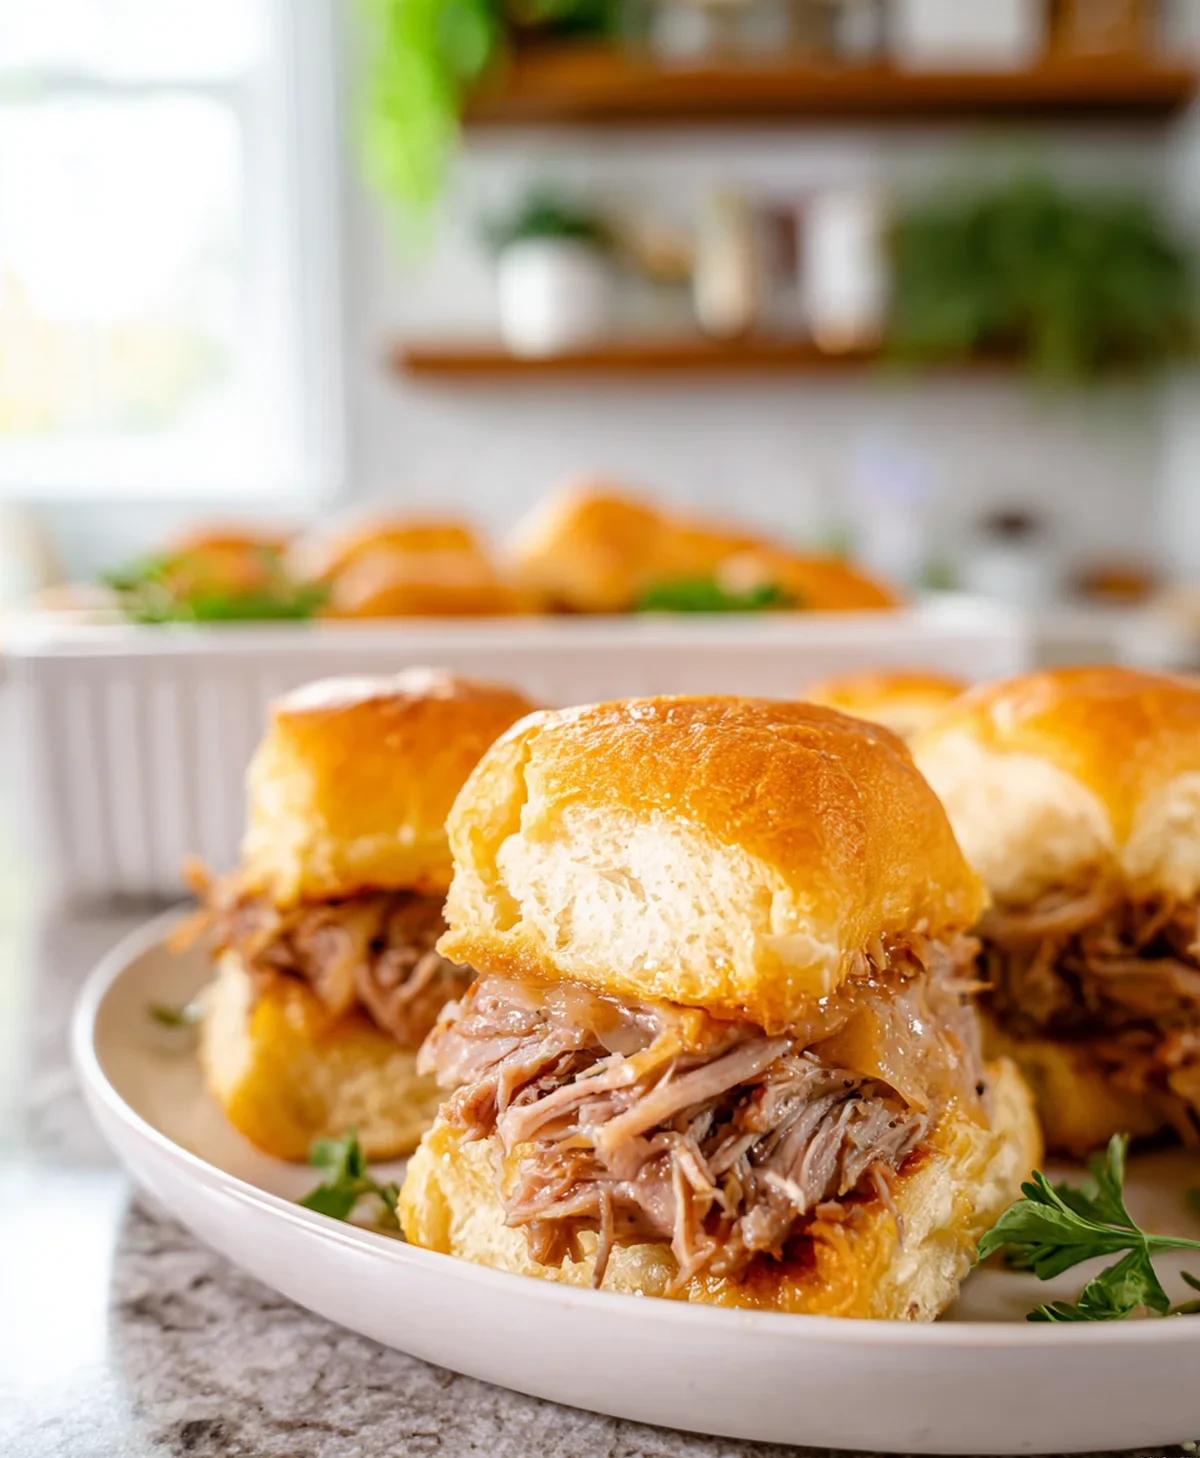
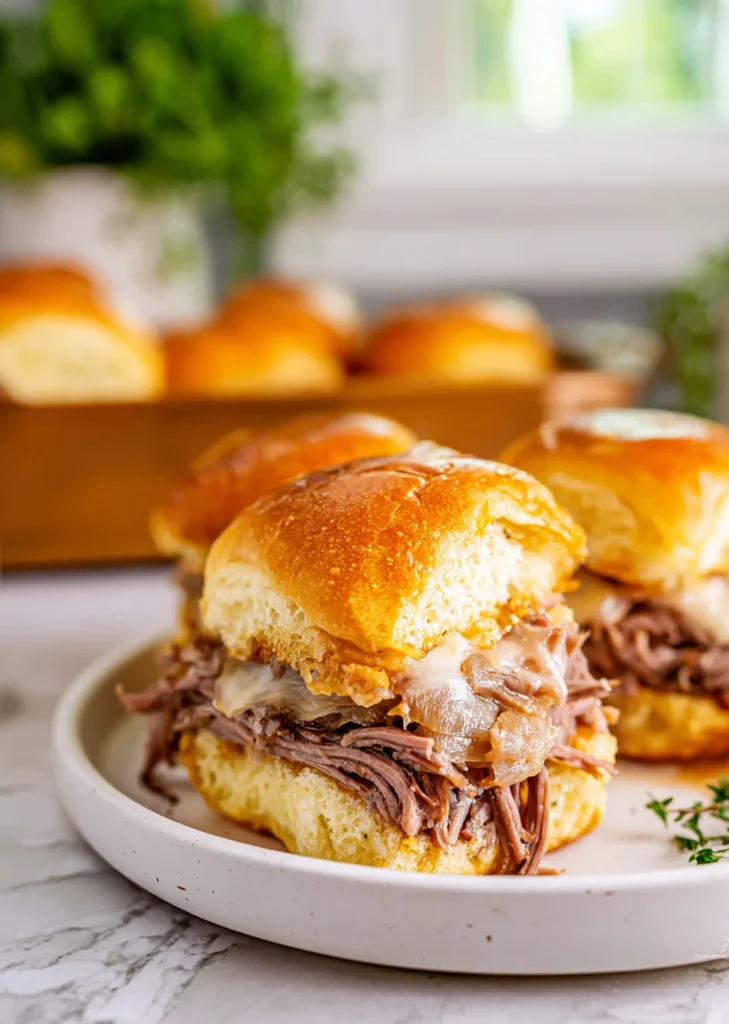
- Place the bottom slab, cut side up, into the prepared baking dish. Top with half of the cheese, add the roast beef, then the cooked onions, spreading them out. Add the remaining cheese, then place the top slab of rolls on top.
- In a small bowl, stir together the melted butter and onion soup mix. Brush this mixture on top of the rolls.
- Cover loosely with foil and bake for 25 minutes. Remove the foil and bake an additional 5 minutes to brown the rolls.
- While the rolls are baking, prepare the au jus per the package directions with the 3 cups of water.
- Serve the rolls with an optional garnish of parsley and au jus on the side for dipping.
Difficulty: Easy • Cuisine: American • Preparation Time: 15 minutes • Cooking Time: 30 minutes • Total Time: 45 minutes • Calories: 360 • Servings: 12
Note: For a spicier version, add a touch of horseradish or a few slices of jalapeño peppers before baking. This adds a delightful kick for those who enjoy a bit of heat.
Health and Flavor Benefits of Ingredients
These French Dip Sliders not only promise delightful flavors but also come with some surprising benefits:
- Onions: Rich in antioxidants and add a natural sweetness when caramelized, enhancing the sliders’ flavor profile. Onions also contain compounds that may help reduce inflammation and lower cholesterol levels.
- Thyme: A fragrant herb that supports digestion and adds a hint of earthiness to the dish. Thyme is also known for its antimicrobial properties, which can boost your immune system.
- Provolone Cheese: Provides a good source of calcium and protein, while its creamy texture complements the roast beef perfectly. Cheese also contains essential vitamins like B12 and riboflavin.
- Roast Beef: High in protein and iron, offering a satisfying and energy-boosting component to the meal. It’s a great source of zinc and vitamin B, which are vital for maintaining a healthy immune system.
- Parsley: A touch of fresh parsley adds a pop of color and is packed with vitamins A and C. Parsley is also rich in antioxidants and supports bone health.

Tasty Pairings to Serve with This Easy Peasy Dish
These French Dip Sliders are versatile companions to various beverages and dishes, making them perfect for any occasion:
- Crispy Potato Wedges: The perfect crunchy side, offering a contrast to the soft sliders. These can be seasoned with rosemary and garlic for an extra burst of flavor.
- Fresh Green Salad: A light, refreshing option that balances the heartiness of the sliders. Toss in some cherry tomatoes, cucumbers, and a zesty vinaigrette for a delightful crunch.
- Cold Beer or Iced Tea: Complements the savory flavors and enhances the casual dining experience. A lager or pale ale pairs wonderfully, while a sweet iced tea offers a non-alcoholic alternative.
- Roasted Vegetables: Add a healthy, colorful element to your meal, rounding out the sliders with nutritious goodness. Roasting brings out the natural sweetness in vegetables like carrots, bell peppers, and zucchini.

Storage Tips and How to Enjoy Leftovers the Easy Peasy Way
Leftovers are a blessing, especially with these delightful sliders. To keep them fresh, store them in an airtight container in the fridge for up to 3 days. Reheat them in the oven at 350°F for about 10 minutes, or until warmed through, to maintain their deliciousness.
For a quick lunch the next day, try reheating them with a slice of tomato or avocado for a fresh twist. If you’re feeling adventurous, use the leftover sliders as a filling for a hearty breakfast wrap with scrambled eggs. With these easy peasy storage tips, you’ll find that these sliders are just as enjoyable the second time around.
As we close this culinary journey, I hope you feel inspired by the warmth and simplicity that these French Dip Sliders bring to the table. Cooking at home is more than just preparing food; it’s about creating moments filled with love, laughter, and a sense of belonging. Whether you’re a seasoned cook or just starting, remember that the heart of any meal is the joy it brings. So gather your loved ones, share some laughter, and enjoy the magic of homemade goodness.
Pin this Easy Peasy recipe!
Love this recipe? Pin the image below to your favorite Pinterest boards and bring a little Easy Peasy comfort to your kitchen whenever you need it.


French Dip Sliders
Ingredients
Equipment
Method
- In a large nonstick skillet over medium heat, melt the butter. Add the onions and saute, stirring occasionally, for about 12-15 minutes until the onions are soft and browned, starting to caramelize, but not at all burnt. Add the thyme, salt, and pepper; stir to combine. Take off the heat and set aside.
- Preheat the oven to 350°F. Spray a 11×7-inch baking dish with nonstick cooking spray.
- Do not pull the rolls apart. Instead, using a large serrated knife, slice the rolls in half (like you would a bagel) so you have a top and bottom “slab.”
- Place the bottom slab, cut side up, into the prepared baking dish. Top with half of the cheese. Add the roast beef. Top with the cooked onions, spreading them out. Add the remaining cheese, then add the top slab of rolls on top.
- In a small bowl stir together the melted butter and onion soup mix. (I like to brush this mixture on top of the rolls to make sure it’s evenly distributed, but you can just pour the butter sauce on top, if preferred.)
- Cover loosely with foil, making sure the foil is not touching the tops of the rolls, and bake for 25 minutes. Take the foil off and bake an additional 5 minutes to brown the rolls.
- While the rolls are baking, prepare the au jus per the package directions with the 3 cups of water.
- Serve the rolls with an optional garnish of parsley and au jus on the side for dipping.