Easter Dirt Cups
Table of Contents
Easter is such a wonderful time of year, full of vibrant colors, joyful gatherings, and the sweet anticipation of spring. And what better way to celebrate than with a dessert that’s as whimsical as it is delicious? Easter Dirt Cups bring back the childlike wonder of digging into a treat that’s layered with surprises. As we gather around the kitchen table, I’m reminded of my own childhood Easters, where the highlight was always the homemade desserts lovingly crafted by my grandmother. These dirt cups are a nod to those cherished times, offering a playful twist with colorful layers and delightful toppings that spark joy in every bite.
The beauty of these Easter Dirt Cups lies in their simplicity and ability to bring smiles to both young and old. They’re a breeze to make, requiring only a handful of ingredients that you likely already have in your pantry. Plus, the creative process of layering and decorating is a wonderful way to involve the little ones, creating memories that will last a lifetime. The blend of creamy pudding, crunchy cookies, and sweet surprises on top makes each spoonful a delightful experience. So, let’s dive into this easy and fun recipe, perfect for bringing a splash of color and cheer to your Easter celebrations.
Why This Recipe Should Be on Your Table
These Easter Dirt Cups bring a unique twist to traditional desserts, making them a delightful addition to any gathering or a special treat for yourself. Here’s why they deserve a spot on your table:
- Nostalgic Fun: This recipe evokes the joy of childhood with its playful presentation, making it perfect for family gatherings. The layers of colorful pudding and the surprising textures mimic the playful nature of digging into a sandbox filled with hidden treasures. Each layer unveils a new taste and texture, reminiscent of the simple joys of childhood.
- Simple Ingredients: With just a few pantry staples, you can create a dessert that’s both impressive and easy to make. You probably have most of these ingredients in your kitchen right now, allowing you to whip up a batch whenever the mood strikes. This simplicity is a testament to how delightful desserts don’t need to be complicated.
- Customizable Colors: Personalize your dirt cups with your favorite colors to match any theme or holiday celebration. Whether you choose pastel shades for Easter or vibrant colors for a birthday, the choice is yours. You can even coordinate the colors with your table setting for a cohesive and festive look.
- Kid-Friendly: A delightful way to engage children in the kitchen, letting them help with mixing and decorating. It’s an excellent opportunity for them to learn basic cooking skills while also allowing their creativity to shine. This hands-on experience can inspire a lifelong love of cooking and baking.
- Make-Ahead Convenience: Perfect for planning ahead, these cups can be prepared in advance, leaving you more time to enjoy with loved ones. They are ideal for busy families who want a delicious dessert without the last-minute rush. By preparing them ahead, you can ensure that the flavors meld beautifully, enhancing the overall taste.
Kitchen Tools to Make This Recipe Easy Peasy
To whip up these delightful bites, you won’t need much — just a few trusty kitchen tools, much like the ones my grandma used when teaching me the joy of homemade snacks.
- Medium Mixing Bowl: Ideal for whisking together your pudding mix and milk. Choose a bowl with enough room to prevent any spills and easy mixing. The right bowl will make the mixing process smoother and more enjoyable.
- Whisk: Essential for achieving a smooth pudding mixture. A good whisk will ensure that there are no lumps, giving you a silky and consistent pudding texture. It’s an indispensable tool that helps achieve the perfect pudding every time.
- Mason Jars: Perfect for layering the ingredients and serving with style. These jars not only look charming but also serve as practical containers for individual servings. They make portion control easy and add a rustic touch to your presentation.
- Spatula: Great for folding in the cool whip and creating even layers. A flexible spatula ensures that you can scrape every last bit of pudding and whip, minimizing waste. It’s a versatile tool that aids in creating clean and precise layers.
- Food Processor: Handy for crushing the Oreo cookies to a fine consistency. Alternatively, a rolling pin and a zip-top bag can be used for a more hands-on approach. This method is not only effective but also a fun activity to involve kids in the preparation.
How to Make This Recipe Easy Peasy
Ingredients
- 1 package (3.9 oz.) vanilla instant pudding mix
- 2 cups cold milk
- 1 container (8 oz.) cool whip, thawed
- 1 package Oreo cookies (finely crushed, with filling removed)
Instructions
- Whisk together pudding mix and milk in a medium bowl for 2 minutes. Allow to set for 5 minutes. The short setting time ensures a perfect consistency that holds well when layered.
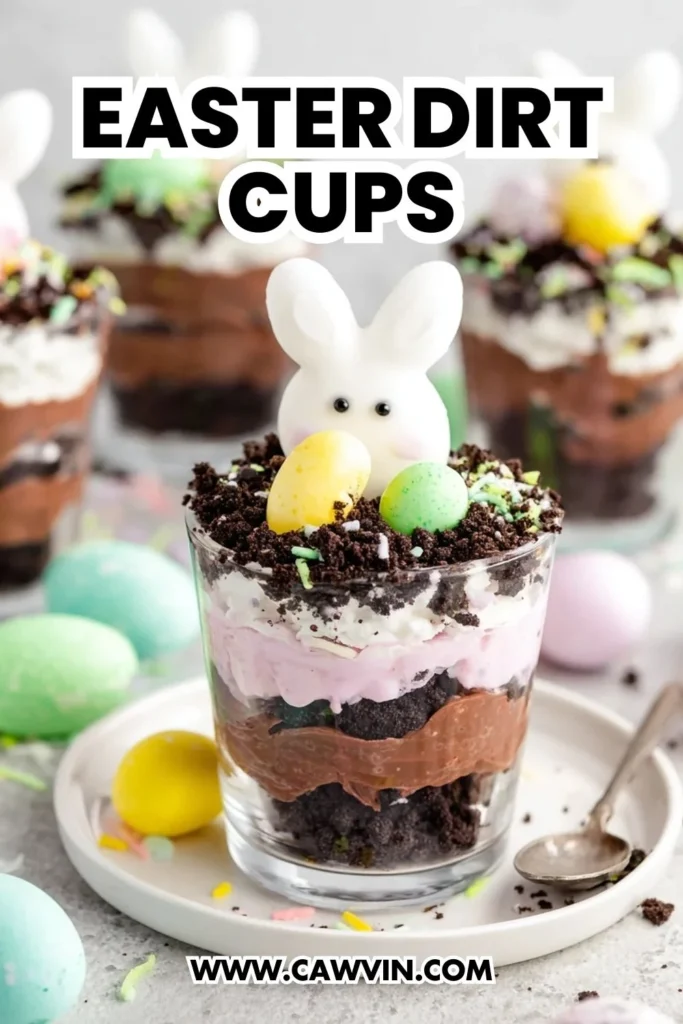
- Separate pudding mixture into two bowls and add food coloring to each bowl. I made a purple bowl and a light pink bowl. You can use whatever colors you want. This step is where you can let your creativity run wild, experimenting with different shades and hues.
- Fold in cool whip. Gently incorporate the cool whip to maintain the pudding’s lightness and fluffiness.
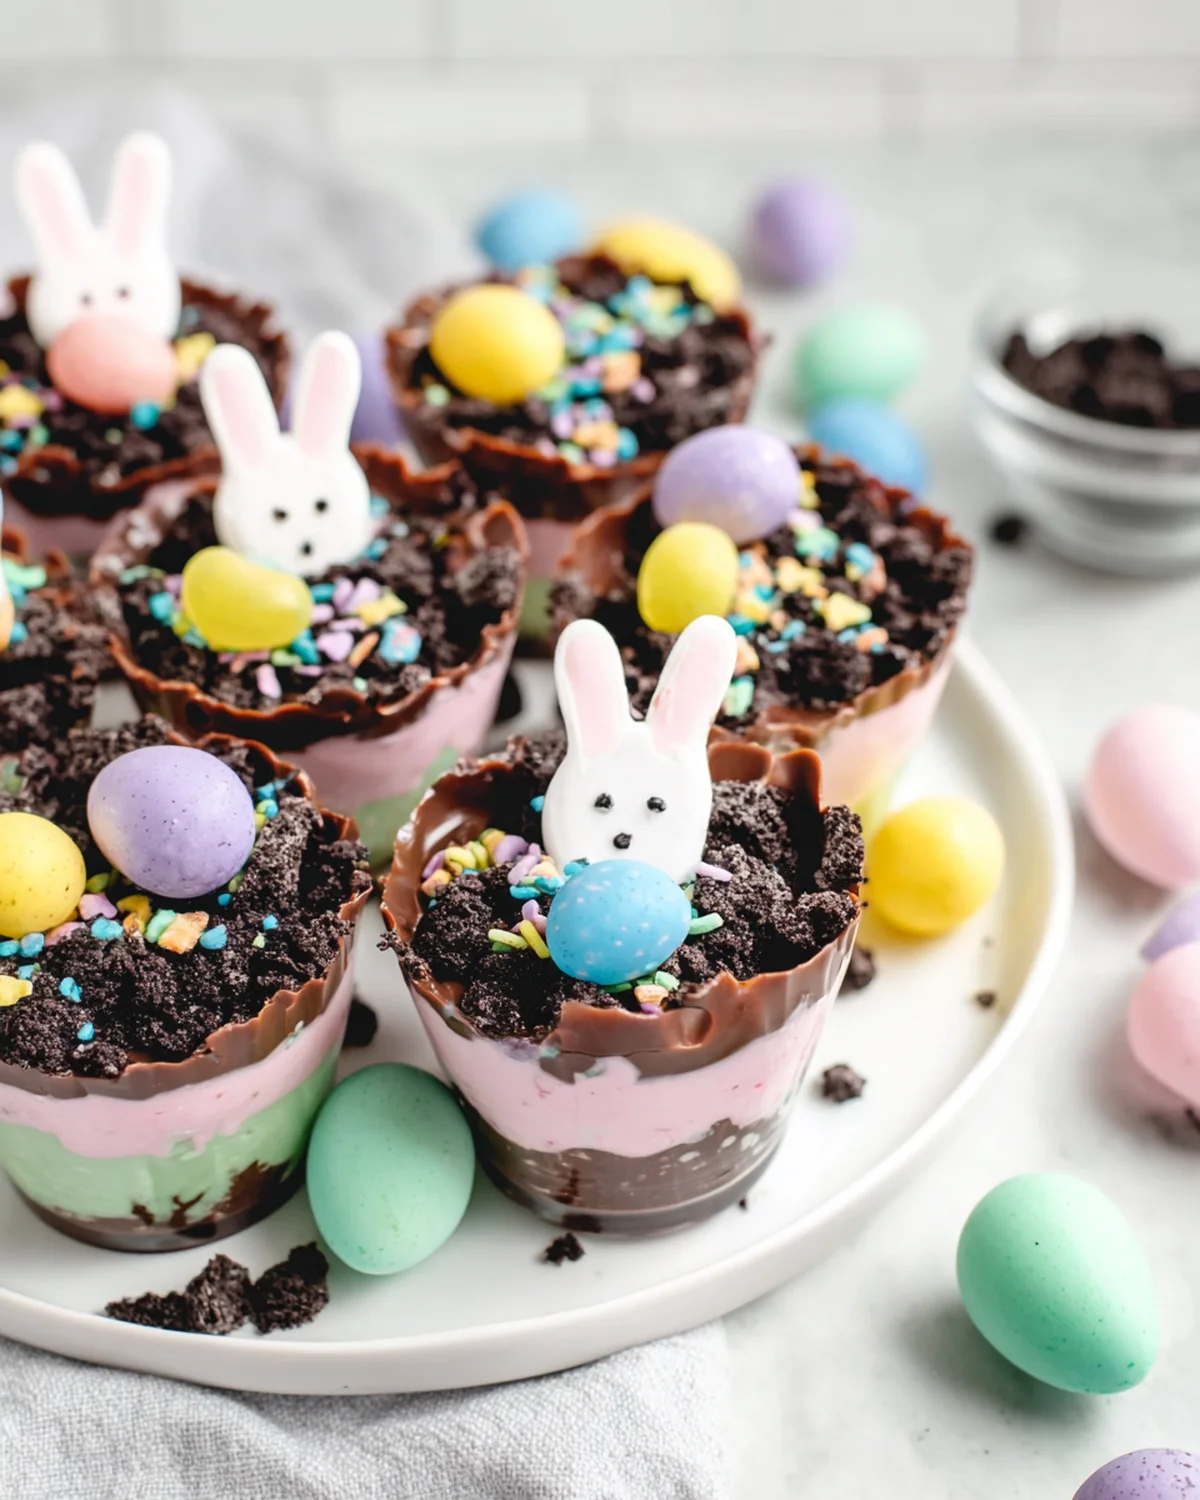
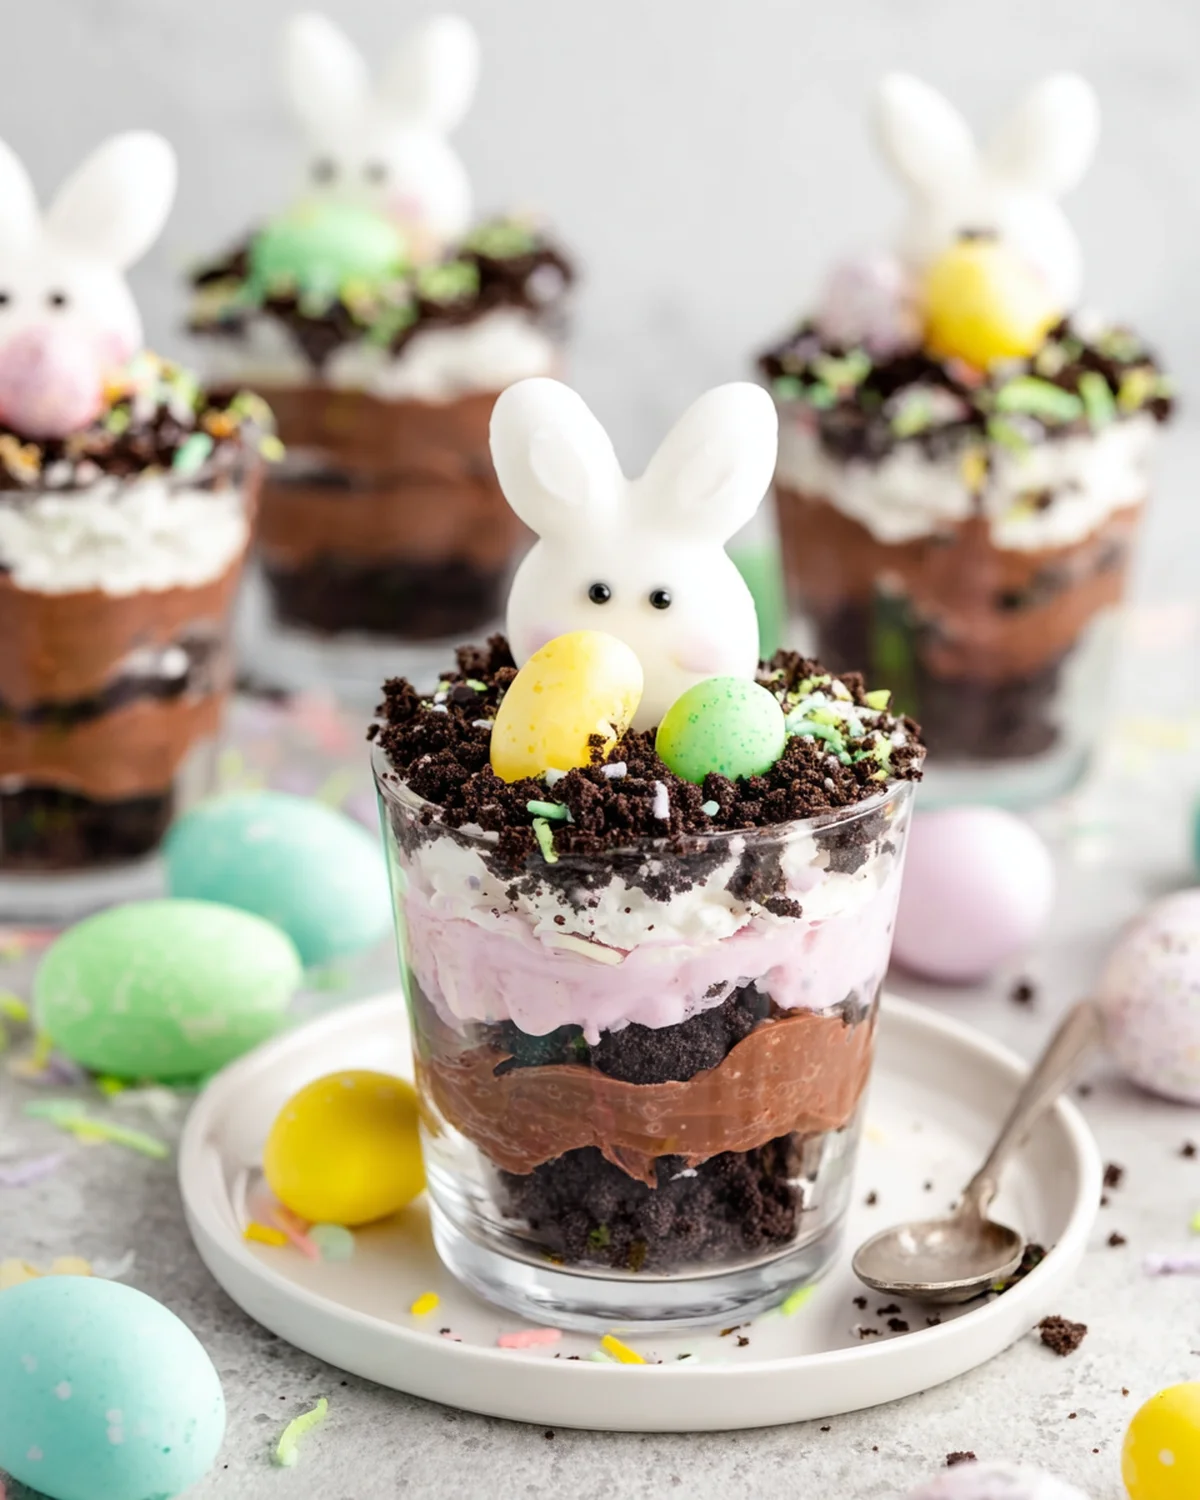
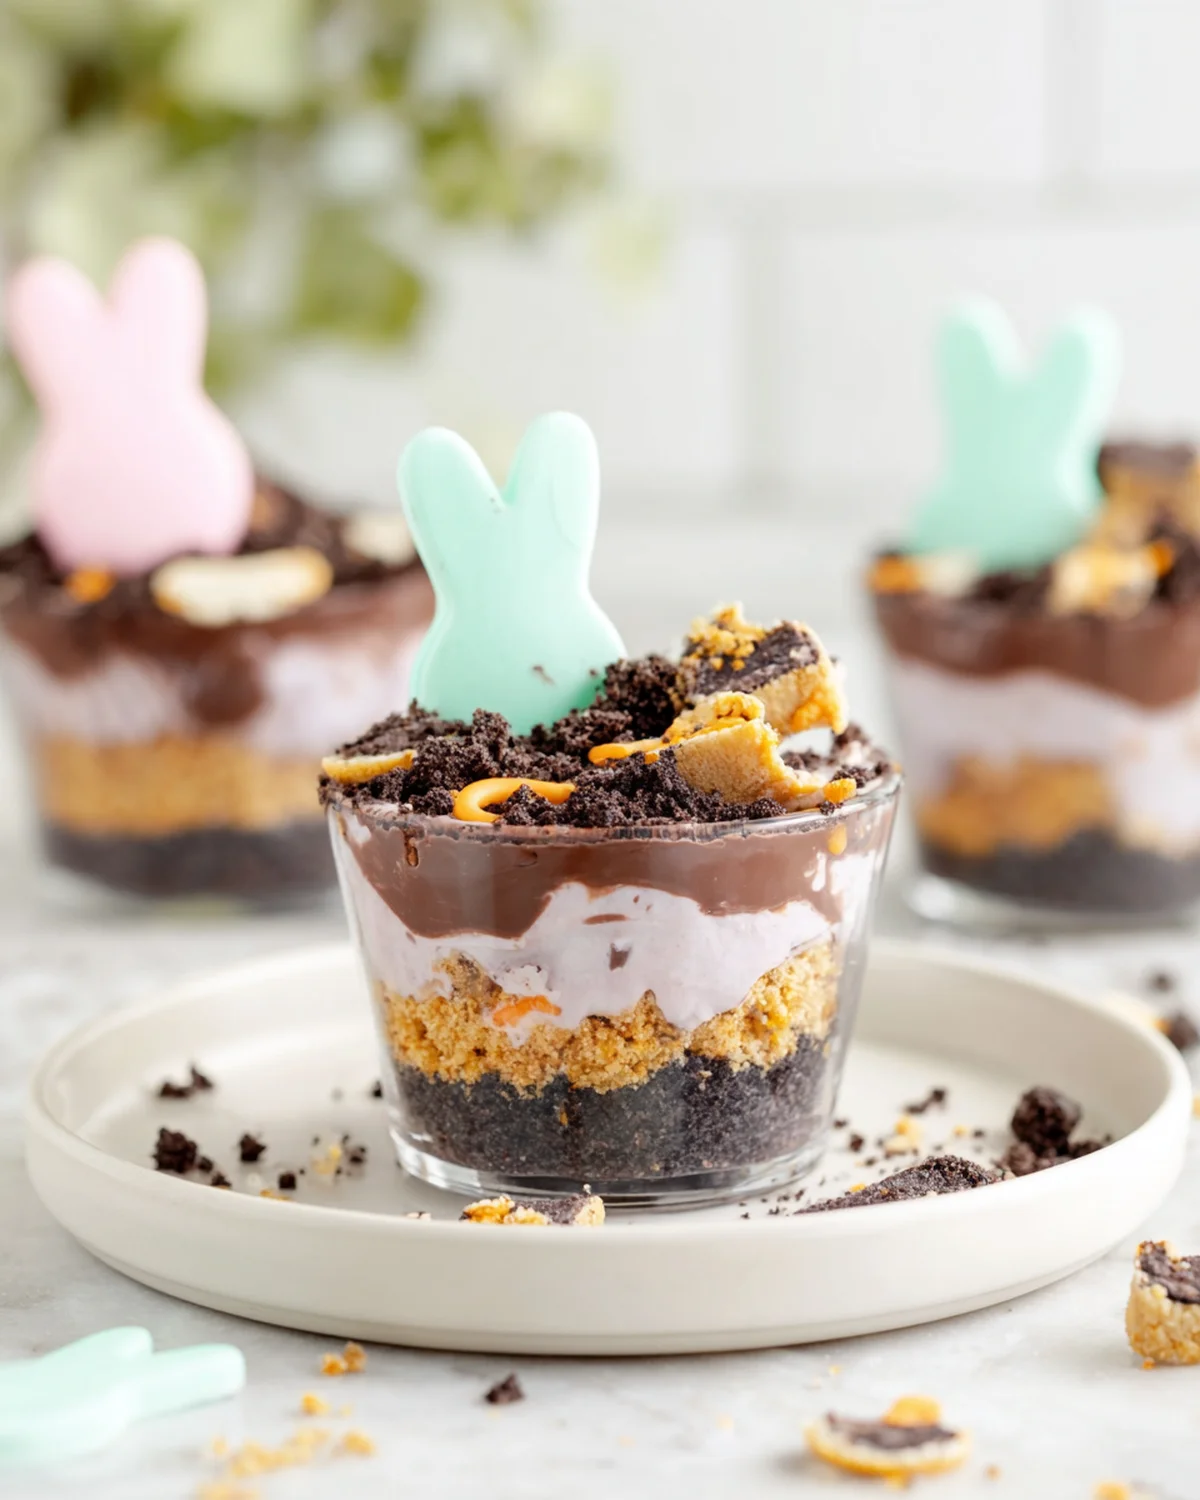
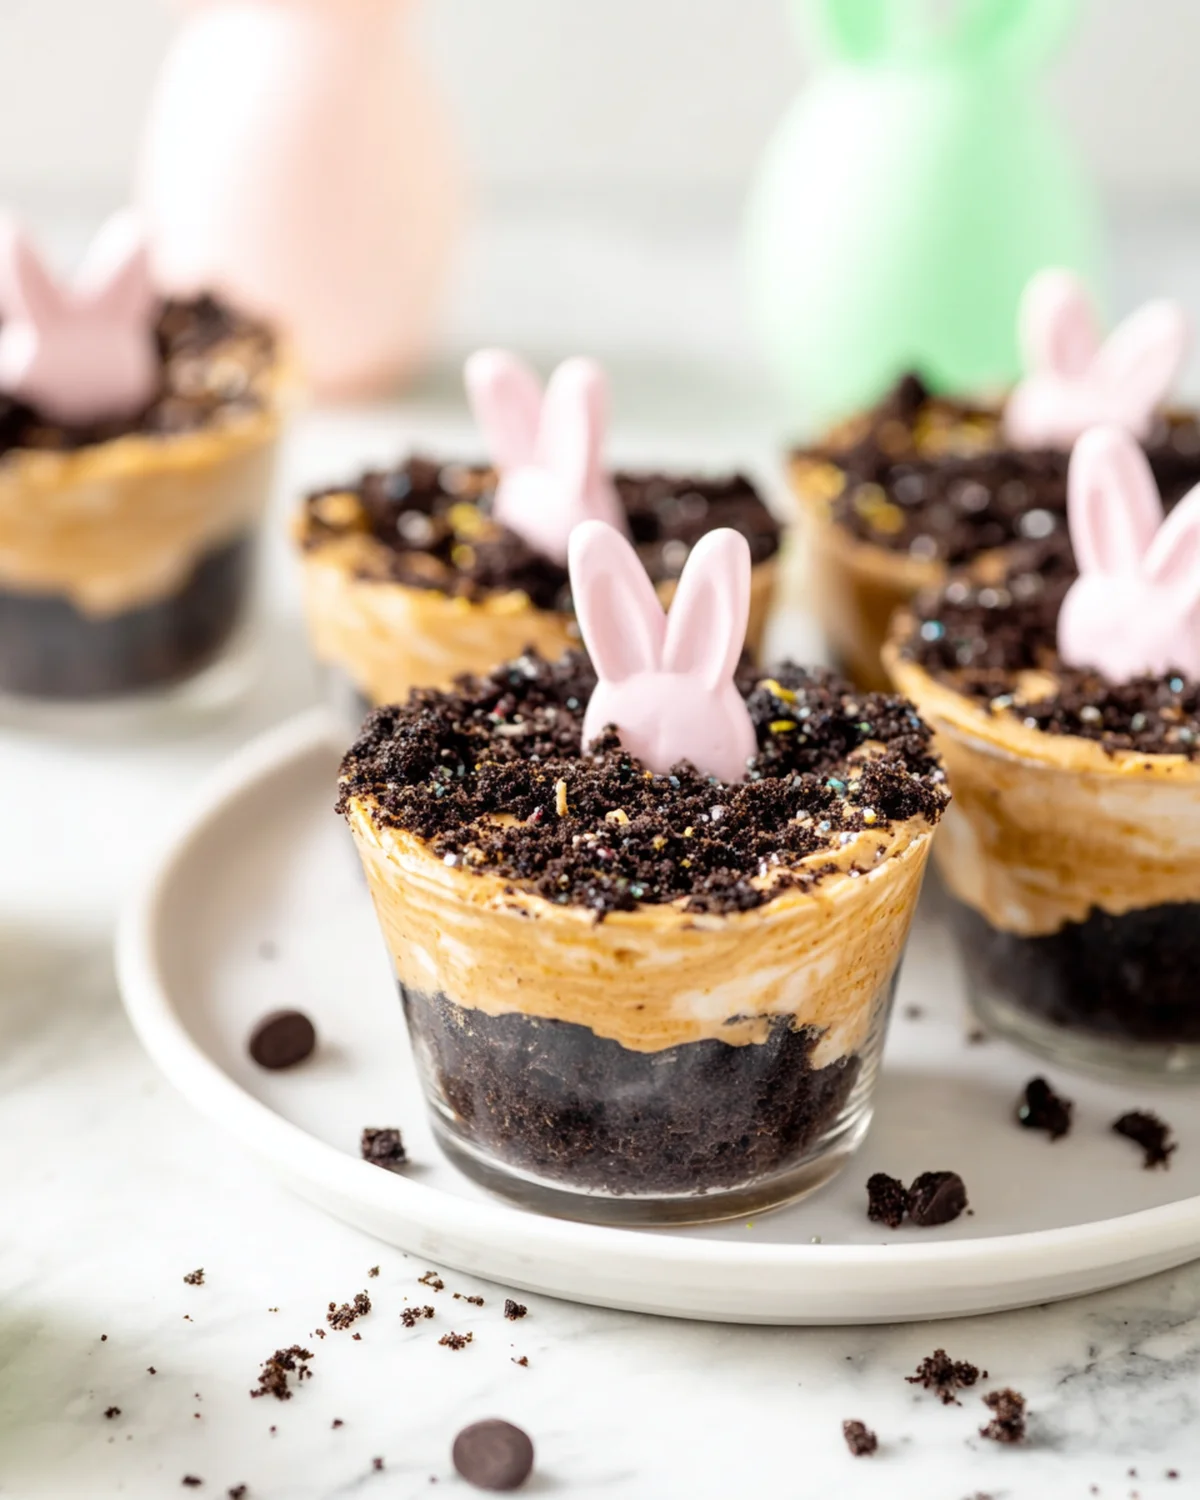
- Add one tablespoon of crushed cookies into the bottom of the mason jars. This creates a crunchy base that mimics the “dirt” in these dirt cups.
- Top with a layer of pudding mixture. Use a spoon or piping bag to keep the layers neat and evenly distributed.
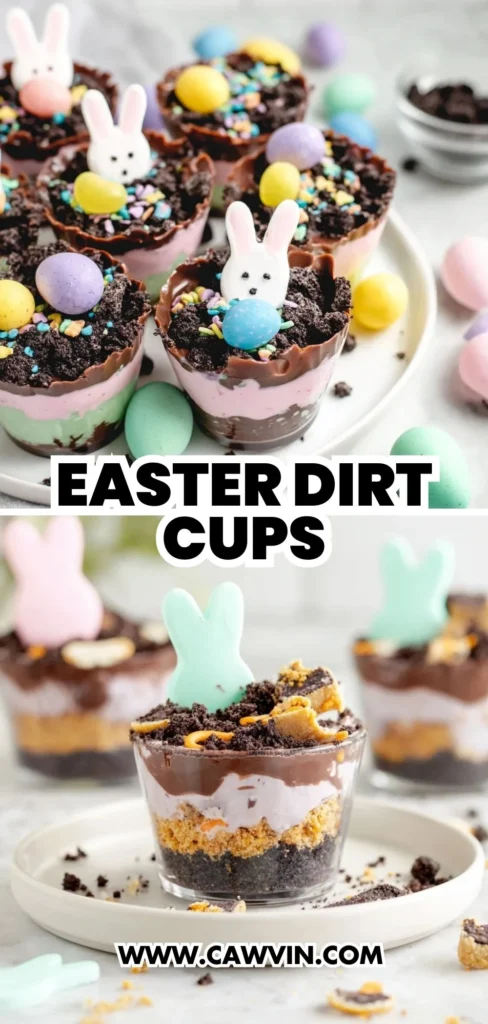
- Repeat layers, alternating with the colored pudding, until ending with cookie mixture. This layering creates a beautiful visual effect, making each cup a mini masterpiece.
- Refrigerate for at least 1 hour. This step allows the flavors to meld and the pudding to firm up for perfect spoonfuls.
- Add your shredded coconut to a container with a lid, add a few drops of food coloring and a touch of water. Shake until colored. The colored coconut adds a grassy effect, enhancing the whimsical garden theme of the dessert.
- Right before serving add some colored shredded coconut on top. Top with candy eggs and Peeps. These toppings bring a festive flair, reminiscent of a springtime garden or an Easter egg hunt.
Difficulty: Easy • Cuisine: American • Preparation Time: 15 minutes • Cooking Time: 0 minutes • Total Time: 15 minutes • Calories: 250 • Servings: 6
Note: Feel free to experiment with different colors and candies to make each cup a unique masterpiece. Consider adding chocolate bunnies or gummy worms for an even more playful presentation.
Health and Flavor Benefits of Ingredients
These Easter Dirt Cups not only promise delightful flavors but also come with some surprising benefits:
- Vanilla Pudding Mix: Provides a creamy texture and a comforting vanilla flavor that’s beloved by all ages. It’s a versatile ingredient that can be paired with countless other flavors and textures. The ease of preparation makes it a go-to for quick and tasty desserts.
- Cool Whip: Adds a light and airy consistency, making each bite feel indulgent without being too heavy. It also provides a subtle sweetness that complements the pudding perfectly. This ingredient is a favorite for those who enjoy a creamy texture without the added heaviness of traditional whipped cream.
- Oreo Cookies: Besides their iconic taste, they add a satisfying crunch and a chocolatey contrast to the creamy layers. Removing the filling before crushing ensures that the cookies maintain their crunch. This step is crucial for achieving the desired texture balance in the dessert.
- Colored Coconut: Not only adds a pop of color but also a subtle hint of tropical flavor. This ingredient can be adjusted to suit your taste—try toasting it lightly for a nuttier flavor profile. The visual appeal it adds makes the dirt cups even more enticing.
Tasty Pairings to Serve with This Easy Peasy Dish
These dirt cups are versatile companions to various beverages and dishes, making them perfect for any occasion:
- Lemonade: The refreshing citrus notes complement the creamy and sweet layers of the dirt cups. It’s an ideal pairing for a sunny spring afternoon. The tartness of lemonade can balance the sweetness, creating a harmonious flavor experience.
- Hot Chocolate: A cozy pairing that enhances the chocolatey goodness of the Oreo layers. This combination is perfect for cooler spring evenings. The warmth of hot chocolate pairs beautifully with the chilled texture of the pudding.
- Fruit Salad: Offers a fresh and light side that balances the richness of the dessert. A medley of berries, melons, and citrus can provide a vibrant and healthy accompaniment. This pairing can add a refreshing contrast, making the overall meal feel more balanced.
- Iced Tea: A classic beverage choice that pairs well with the playful flavors of the dirt cups. Opt for a mildly sweetened or unsweetened variety to contrast the sweetness of the dessert. The subtle flavors of iced tea can enhance the overall tasting experience without overpowering it.
Storage Tips and How to Enjoy Leftovers the Easy Peasy Way
To keep your Easter Dirt Cups fresh and delicious, store them in the refrigerator with a lid or plastic wrap covering the tops of the jars. They can be stored for up to three days, making them a convenient make-ahead dessert. This makes them perfect for preparing the night before a big gathering, allowing you to focus on other preparations on the day of your event.
If you have any leftovers, simply stir them together to enjoy as a delicious pudding parfait. The flavors meld beautifully overnight, offering a slightly different, yet equally enjoyable experience. This parfait-style treat can be a delightful breakfast or a quick snack, with the flavors intensifying over time.
There’s something truly magical about creating dishes that bring back cherished memories while simultaneously creating new ones. Whether you’re crafting these Easter Dirt Cups for a family gathering or a quiet afternoon treat, know that you’re sharing a piece of joy and tradition with each spoonful. It’s these simple moments in the kitchen that remind us of the love and warmth that homemade cooking brings to our lives. Here’s to celebrating Easter with a touch of whimsy and a whole lot of heart.
Pin this Easy Peasy recipe!
Love this recipe? Pin the image below to your favorite Pinterest boards and bring a little Easy Peasy comfort to your kitchen whenever you need it.
Easter Dirt Cups
Ingredients
Equipment
Method
- Whisk together pudding mix and milk in a medium bowl for 2 minutes. Allow to set for 5 minutes.
- Separate pudding mixture into two bowls and add food coloring to each bowl. I made a purple bowl and a light pink bowl. You can use whatever colors you want.
- Fold in cool whip.
- Add one tablespoon of crushed cookies into the bottom of the mason jars.
- Top with a layer of pudding mixture.
- Repeat layers, alternating with the colored pudding, until ending with cookie mixture.
- Refrigerate for at least 1 hour.
- Add your shredded coconut to a container with a lid, add a few drops of food coloring and a touch of water. Shake until colored.
- Right before serving add some colored shredded coconut on top. Top with candy eggs and Peeps.