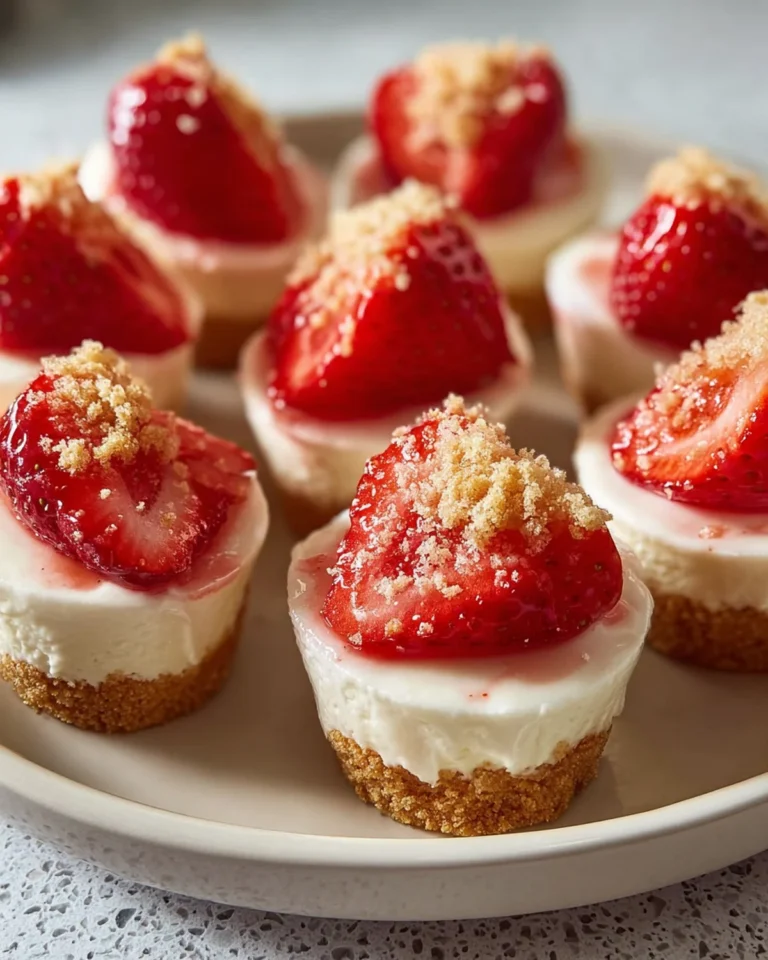
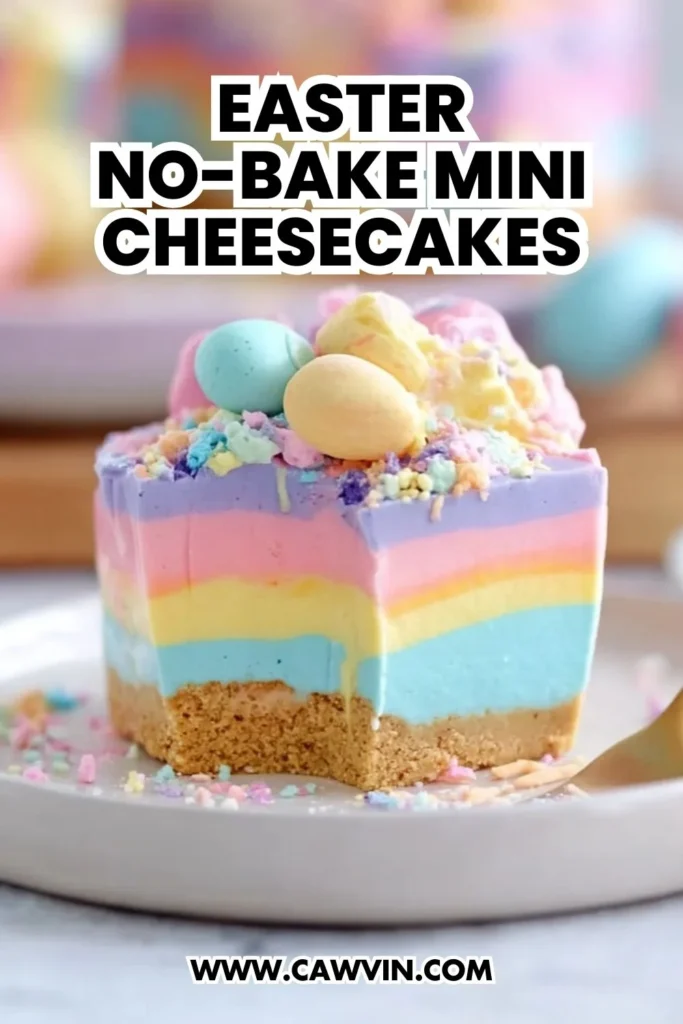
Easter No Bake Mini Cheesecakes
Table of Contents
Spring is in the air, and with it comes the promise of Easter, a time that brings back memories of pastel-colored eggs, laughter-filled family gatherings, and the delightful anticipation of dessert. The smell of fresh blooms and the sound of laughter always take me back to my grandmother’s cozy kitchen, where I first fell in love with the art of simple, yet heartwarming cooking. Today, I’m sharing a recipe that embodies all those cherished memories in one bite-size treat: Easter No-Bake Mini Cheesecakes.
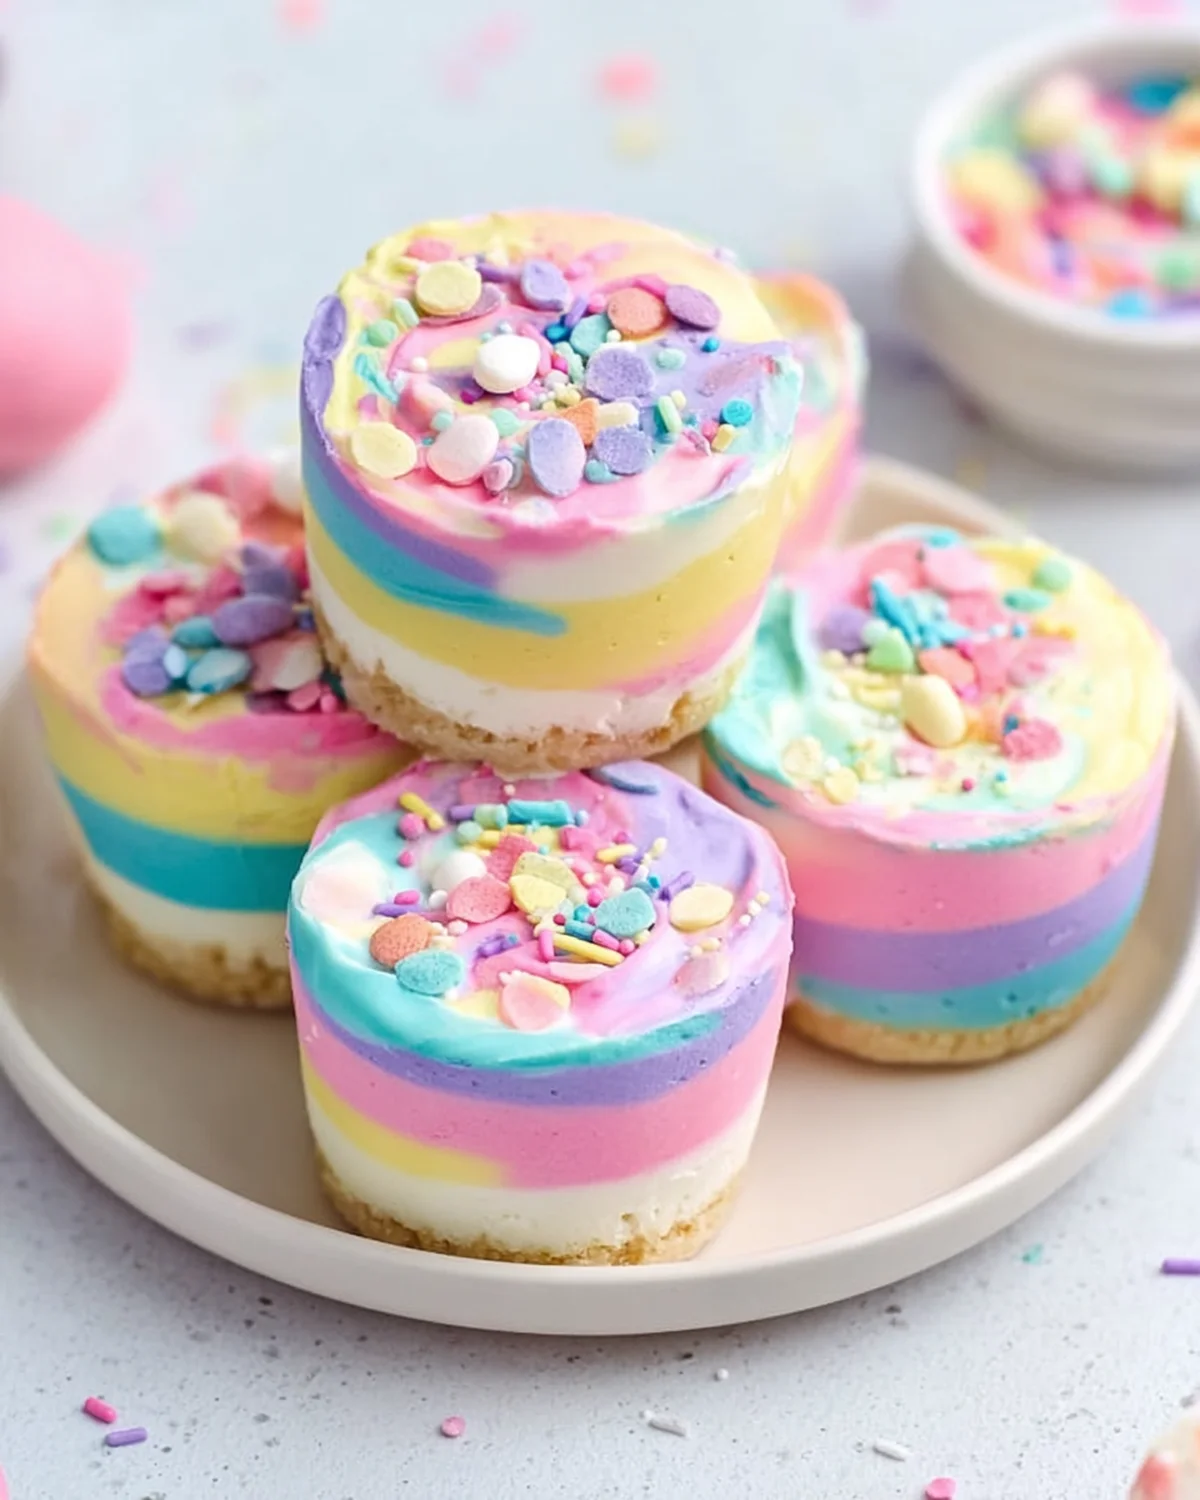
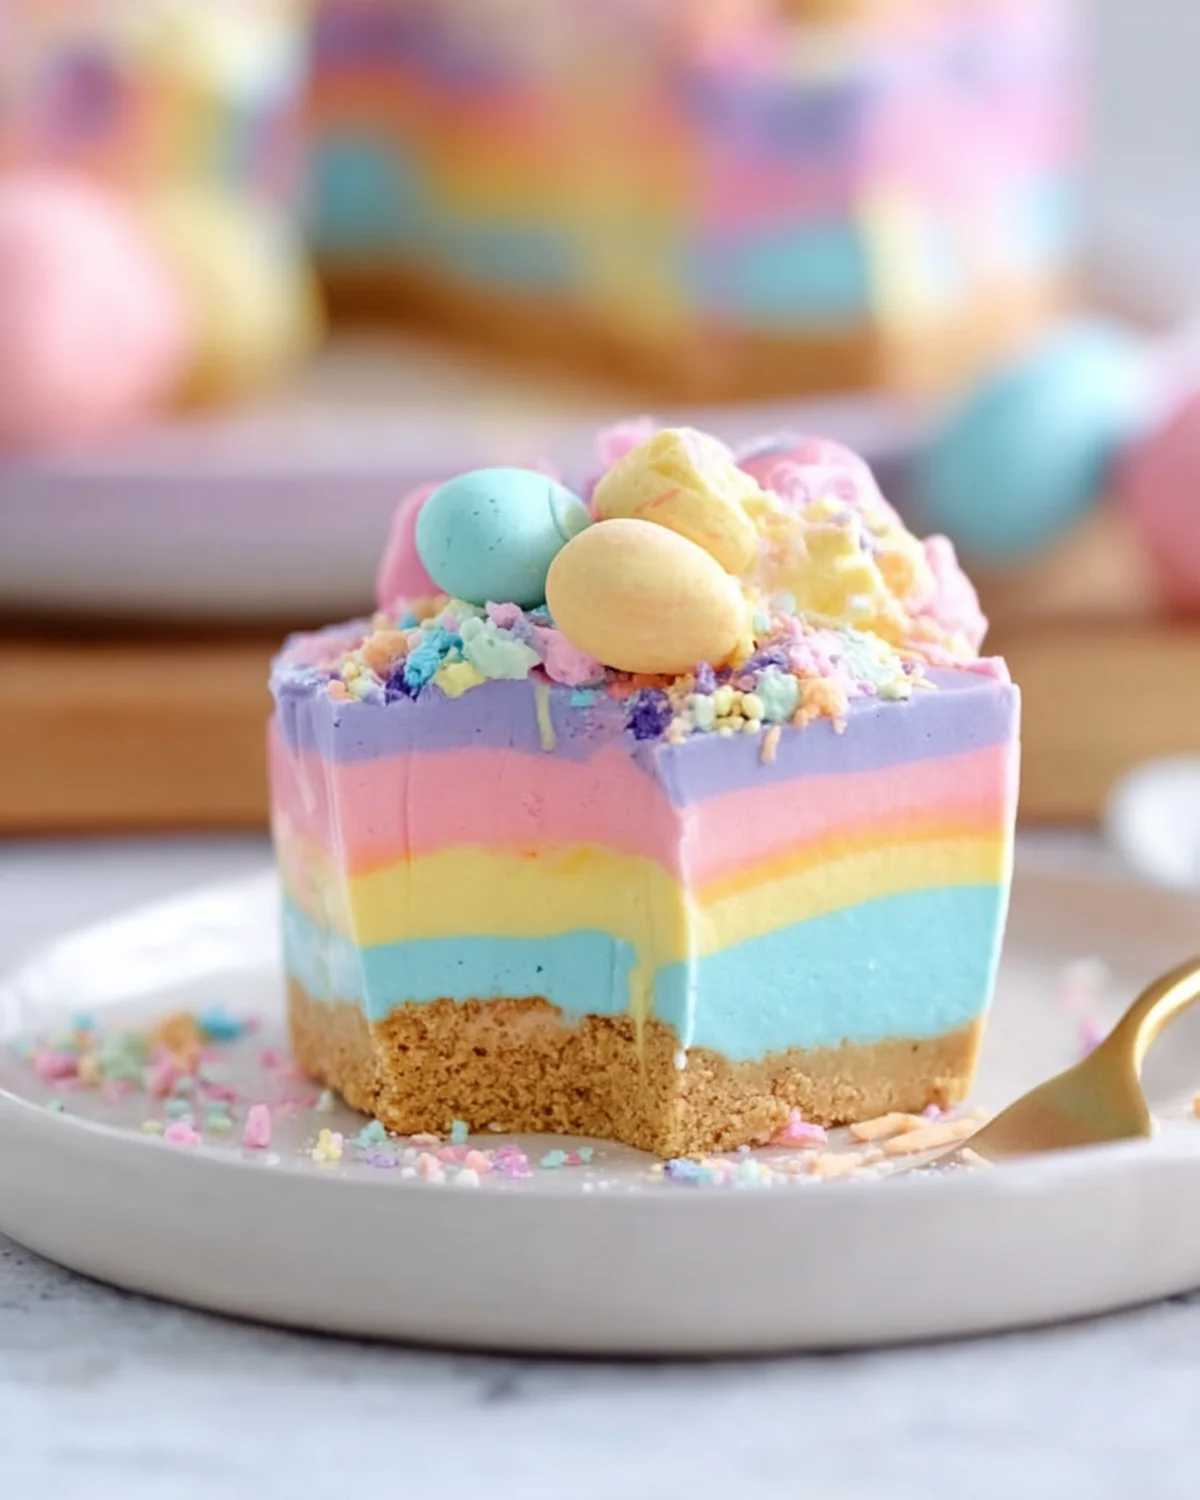
These little cheesecakes are a celebration of everything that makes Easter special. They’re not just a delight to the taste buds but a feast for the eyes, too, with their vibrant layers of pastel colors. They’re easy enough for a beginner to tackle, yet they carry the sophistication of a dessert that took hours to prepare. Best of all, they bring people together, much like those joyful Easter gatherings of my childhood. With no need for an oven, these mini cheesecakes are a breeze to prepare, leaving more time for what truly matters — savoring moments with loved ones.
Imagine the joy of surprising your family with these beautiful, colorful cheesecakes that look like they’ve been plucked straight from a fairytale. Not only are they visually stunning, but each creamy bite melts in your mouth, offering a burst of sweet nostalgia. The buttery shortbread crust is a nod to those classic desserts of yesteryear, while the light and fluffy filling is the perfect canvas for a splash of Easter cheer.
Why This Recipe Should Be on Your Table
These Easter No-Bake Mini Cheesecakes bring a unique twist to traditional desserts, making them a delightful addition to any gathering or a special treat for yourself. Here’s why they deserve a spot on your table:
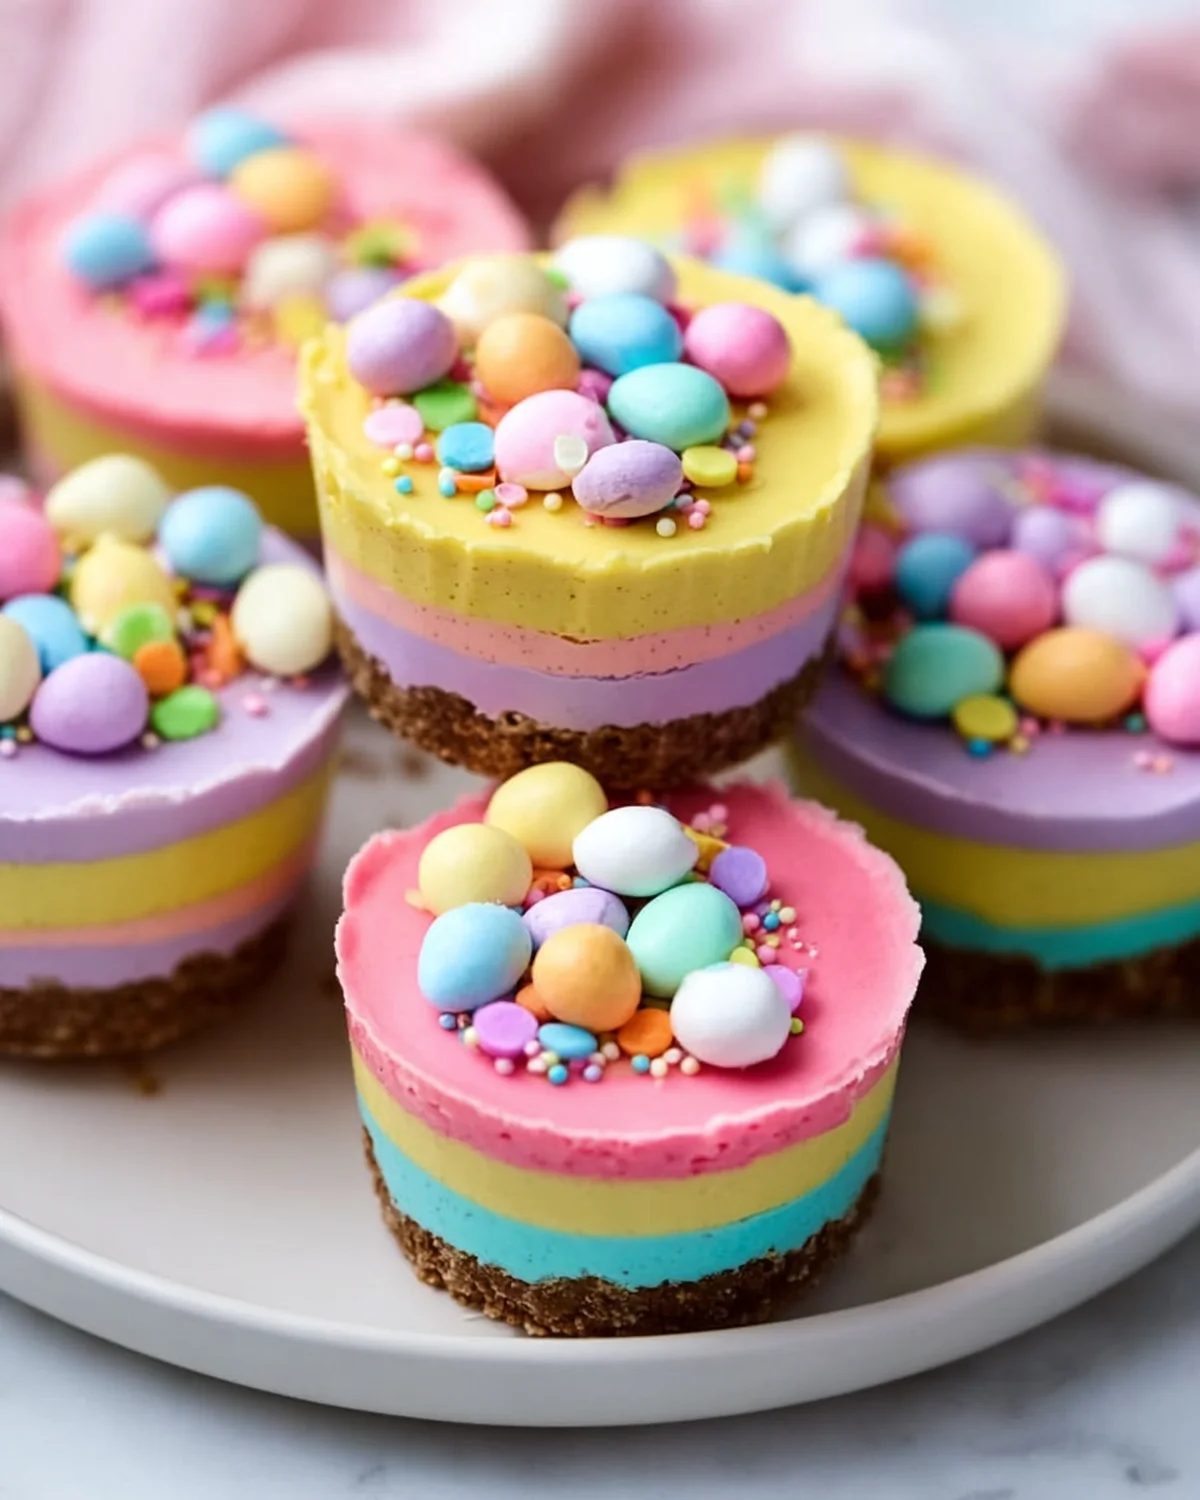
Visual Delight: Each mini cheesecake is a burst of vibrant colors, perfect for brightening up your Easter table and wowing your guests. The pastel hues not only make them visually appealing but also set the tone for a festive spring gathering.
No-Bake Simplicity: With no oven required, this recipe is perfect for keeping the kitchen cool and stress-free, allowing you to focus on enjoying the holiday. This means you can prepare them even if you’re hosting a big family gathering and need to use the oven for other dishes.
Family-Friendly Fun: This is a great recipe for involving little ones in the kitchen. They’ll love choosing colors and decorating with whipped cream and candy eggs. It’s a wonderful opportunity to teach them the basics of cooking and to create lasting memories together.
Make-Ahead Convenience: Prepare these cheesecakes in advance, so you can focus on spending quality time with your family and friends. They can be made a day or two before your event, allowing you to tick one item off your to-do list early.
Kitchen Tools to Make This Recipe Easy Peasy
To whip up these delightful bites, you won’t need much — just a few trusty kitchen tools, much like the ones my grandma used when teaching me the joy of homemade snacks:
Food Processor: Essential for blitzing shortbread cookies into fine crumbs for that perfect crust. It ensures a uniform texture that binds well with the melted butter, providing a sturdy base for your cheesecakes.
Silicone Muffin Pan: Perfect for shaping and easily removing your mini cheesecakes once set. The silicone material makes it simpler to pop out the cheesecakes without damaging them compared to traditional metal pans.
Stand Mixer or Hand Mixer: Helps achieve a smooth, lump-free cheesecake filling effortlessly. A mixer saves time and ensures that the ingredients are evenly distributed, giving a consistent flavor throughout.
Microwave: Quick and easy way to melt the gelatin, ensuring it mixes smoothly into the cheesecake filling. This method is both efficient and helps maintain the gelatin’s texture without clumps.
Measuring Cups and Spoons: For precise ingredient measurement, ensuring consistent results every time. Accurate measurements are crucial for the delicate balance of flavors and textures in this recipe.
How to Make This Recipe Easy Peasy
Ingredients
- 6 oz shortbread cookies (approx. 12 round cookies)
- .5 oz unsalted butter (1 TBSP), melted
- 2 TBSP cold water
- 1 packet unflavored powdered gelatin (1/4 oz, or 2.5 tsp)
- 1 lb cream cheese (full-fat, at room temperature)
- 3.5 oz granulated sugar (½ cup)
- ½ tsp lemon juice
- 1 tsp vanilla bean paste (can substitute vanilla extract)
- Pinch of salt
- 1 cup heavy cream (at room temperature)
- Assorted gel food coloring (4 colors recommended, I use Americolor brand)
- ½ cup whipped cream (to decorate)
- Candy eggs (to decorate)
- Sprinkles (to decorate)
Instructions
Place a jumbo silicone muffin pan on a baking sheet. Blitz shortbread cookies in a food processor until fine crumbs form. Mix with melted butter to make sure every crumb is coated, which helps in binding the crust.
Divide crumbs between 6 cavities in the muffin pan, pressing firmly to form crusts. Use the back of a spoon or a small glass to ensure an even and compact base.
Hydrate gelatin by sprinkling it over cold water in a small bowl. Whisk and let sit for 5 minutes. This step is critical for achieving the right texture; make sure the gelatin absorbs all the water.
Beat cream cheese in a stand mixer until smooth. Starting with room temperature cream cheese prevents lumps.
Add sugar, lemon juice, vanilla, and salt to cream cheese. Mix well until the sugar is fully dissolved and the mixture is creamy. Gradually add heavy cream on low speed until combined.
Microwave gelatin for 10-15 seconds until melted. Stir to ensure it’s smooth and lump-free. Make sure it cools slightly to avoid curdling the cheese.
Add warm gelatin to cheesecake filling, mixing well. The mixture should be smooth and slightly thickened.
Divide filling into 4 portions. Mix each with a different gel food coloring. Use a toothpick to add color gradually to achieve the desired pastel shade.
Layer colored cheesecake fillings into muffin pan cavities, smoothing each layer with a spoon. Ensure each layer sets slightly before adding the next for clear, defined layers.
Freeze for at least 2 hours until firm. This allows the gelatin to set fully, ensuring the cheesecakes hold their shape.
Unmold cheesecakes by pressing up from the bottom. The silicone pan should make this easy, but if needed, a gentle push can help release the cheesecakes.
Decorate with whipped cream, candy eggs, and sprinkles. Serve chilled. Store any leftovers in the refrigerator to maintain their texture.
Difficulty: Easy • Cuisine: American • Preparation Time: 1 hour • Cooking Time: 0 minutes • Total Time: 3 hours • Calories: 579 • Servings: 6
Note: Ensure gelatin is warm when mixing to prevent clumping in the filling.
Health and Flavor Benefits of Ingredients
These Easter No-Bake Mini Cheesecakes not only promise delightful flavors but also come with some surprising benefits:
Cream Cheese: Provides a rich, creamy texture and is a good source of calcium, which is essential for bone health.
Lemon Juice: Adds a fresh, zesty flavor that brightens the overall taste while providing a dose of vitamin C, an important antioxidant that supports the immune system.
Vanilla Bean Paste: Offers a deep, aromatic flavor that enhances the sweetness of the dessert without added sugar. It’s made from real vanilla beans, giving a more intense vanilla flavor.
Shortbread Cookies: Classic buttery taste that complements the creamy filling, providing texture and nostalgia. They add a comforting, familiar flavor that many associate with home-baked goods.
Tasty Pairings to Serve with This Easy Peasy Dish
These cheesecakes are versatile companions to various beverages and dishes, making them perfect for any occasion:
Fresh Berries: The natural sweetness and acidity of fresh berries beautifully complement the creamy, rich texture of the cheesecakes. Consider a mix of strawberries, blueberries, and raspberries for a colorful and flavorful addition.
Iced Tea: A refreshing glass of iced tea balances the dessert’s richness, making it a delightful pairing on a warm spring day. Opt for a lightly sweetened or herbal tea to enhance the flavors without overpowering them.
Coffee: A cup of coffee provides a robust contrast to the sweetness, enhancing the overall flavor experience. Whether you prefer espresso, cappuccino, or a simple black coffee, it complements the cheesecakes beautifully.
Storage Tips and How to Enjoy Leftovers the Easy Peasy Way
To keep your mini cheesecakes tasting fresh, wrap them well and store in the fridge for up to 4-5 days. Use airtight containers to prevent them from absorbing any odors from other foods. If you’re planning to make them ahead of time, they can be frozen — just ensure they’re tightly wrapped to prevent freezer burn. Thaw them overnight in the fridge before serving for the best texture.
For a quick treat, enjoy a leftover cheesecake straight from the fridge with a dollop of whipped cream or a handful of your favorite berries. They make a delightful afternoon snack or a sweet ending to a weekday dinner. If you’re feeling adventurous, crumble any leftover cheesecakes over a bowl of ice cream for a decadent dessert.
As you gather around the table this Easter, let these No-Bake Mini Cheesecakes be a reminder of the joy found in homemade creations. They’re more than just a sweet ending to a meal; they’re a symbol of love, tradition, and the simple pleasures of sharing food with those who matter most. Here’s to celebrating the warmth of family and the delicious memories we create together. Until next time, happy cooking and even happier memories!
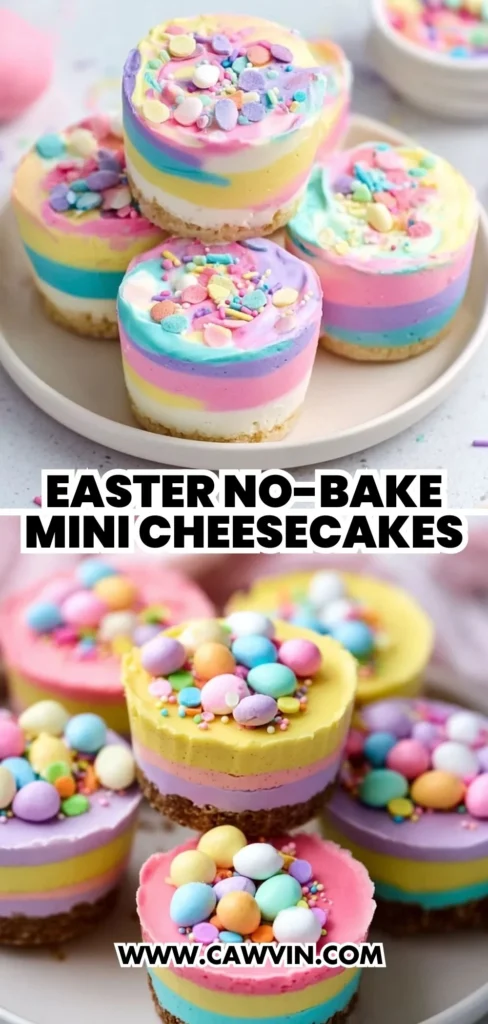
Pin this Easy Peasy recipe!
Love this recipe? Pin the image below to your favorite Pinterest boards and bring a little Easy Peasy comfort to your kitchen whenever you need it.
Easter No-Bake Mini Cheesecakes
Ingredients
Equipment
Method
- Make the crust. Place a jumbo silicone muffin pan on a baking sheet. Blitz the shortbread cookies in a food processor, or crush them in a plastic bag with a rolling pin until they’re fine crumbs. Mix them in a small mixing bowl with the melted butter.
- Fill pan with crust. Divide the shortbread crumbs between the 6 cavities in the muffin pan, and press them firmly into the bottom of the pan to form your cheesecake crust.
- Hydrate gelatin. Place the cold water in a small bowl, and sprinkle the gelatin on top. Whisk them together, then let the bowl sit for 5 minutes so the gelatin can hydrate and absorb the water.
- Beat cream cheese. Meanwhile, put the room temperature cream cheese in the bowl of a large stand mixer fitted with a paddle attachment, and beat it until it is smooth, creamy, and free of lumps. (A hand mixer can also be used.)
- Add ingredients to cheesecake filling. Add the sugar, lemon juice, vanilla bean paste, and salt. Mix well, scraping the bottom and sides of the bowl occasionally. With the mixer running on low speed, gradually add the room temperature heavy cream, mixing until everything is smooth and well-combined.
- Heat gelatin. Once the gelatin feels very firm, microwave it for 10-15 seconds, until fully melted, liquid, and warmer than room temperature but not hot. Use a small whisk or spoon to stir the gelatin and ensure it’s lump-free. Add the warm liquid gelatin to the room temperature cheesecake filling and mix it in by hand, scraping the sides and bottom well.
- Divide and color cheesecake filling. Divide the cheesecake into 4 portions (each should be about 7 oz, if you want to measure them out.) Stir a drop of gel food coloring into each one and mixing until the color is smooth and uniform.
- Top crust with first layer of cheesecake. Take your first color and divide it between the 6 cavities—I found it was fastest and easiest to use a cookie scoop, but you could use a regular spoon, or even pipe the cheesecake in if you want to be really precise. Spread it into a smooth layer with the back of a spoon, then add a second color on top of the first.
- Work quickly to finish layers. Continue to layer the cheesecake colors until all 4 of them have been added to the pan. It’s important to work fairly quickly during this step, so the cheesecake colors don’t start to set too much and become difficult to spread.
- Freeze. Smooth the tops of the cheesecakes, then place them in the freezer for at least 2 hours to firm up — they should feel very solid to the touch before you try to unmold them.
- Unmold the cheesecakes. Press from the bottom of one of the silicon cavities and turn it upside-down, pushing the cheesecake out into your hand. Repeat until all the cheesecakes have been unmolded.
- Defrost and decorate. Let the cakes sit at room temperature for 30 minutes to warm. Then top each cheesecake with a swirl of whipped cream, a pinch of sprinkles, and a few candy eggs, if desired. Serve chilled but not frozen.
- Storage. Store the cheesecakes, well-wrapped, for 4-5 days in the refrigerator.